

Hello babes, and welcome to our second Spooky Spoopy Halloween!
This Wednesday we will show you a red/black outfit idea, some devilish cupcakes and a mermaid makeup!
Stay tricky and spend this week thinking about Halloween 8)
If you happen to use these tutorials, don't forget to tag us #cosplayaesthetic !
OUTFIT by EIREENENE
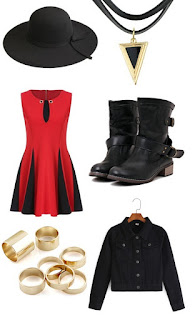
This week outfit is a bit more colorful, with addition of red and gold! The hat is a must-have for this season, and as it the chocker. In particular this one comes with a pendant of a gold and black triangle. This shape adjust perfectly with the skirt of the dress. Boots are perfect for the mid of autumn! Lastly, a lot of gold rings to preserve the chocker to be the only shiny thing in the outfit, and a black denim jacket, because denim is hella fashion nowadays and because it's October geez it's cold! So if you wanna wear some tights with this outfit, just go with a warm full-black and you're done !
Hello babes, and welcome to our second Spooky Spoopy Halloween!
This Wednesday we will show you a red/black outfit idea, some devilish cupcakes and a mermaid makeup!
Stay tricky and spend this week thinking about Halloween 8)
If you happen to use these tutorials, don't forget to tag us #cosplayaesthetic !
OUTFIT by EIREENENE

TREATS by CYCLOVE

SECOND WEEK BEFORE HALLOWEEN WOO!
This week treat: DEVIL. This is the simplest one in the batch, so for everyone and everytime!
If you have little time to do something for a party this is for you!
Let's get started!
This week treat: DEVIL. This is the simplest one in the batch, so for everyone and everytime!
If you have little time to do something for a party this is for you!
Let's get started!
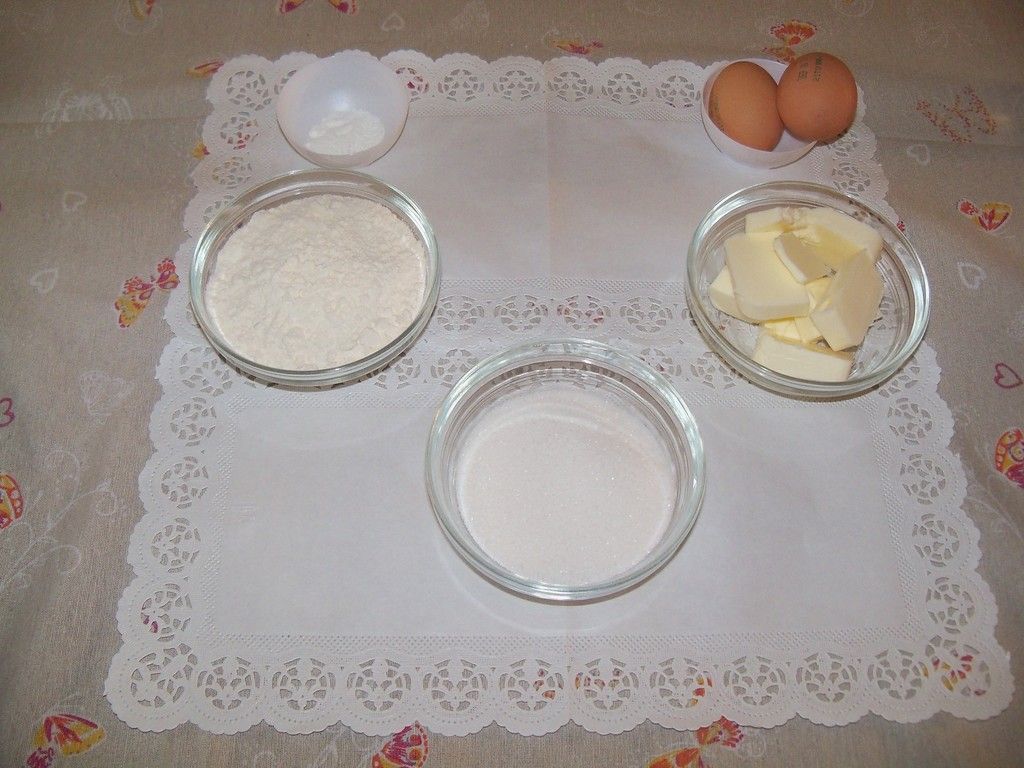
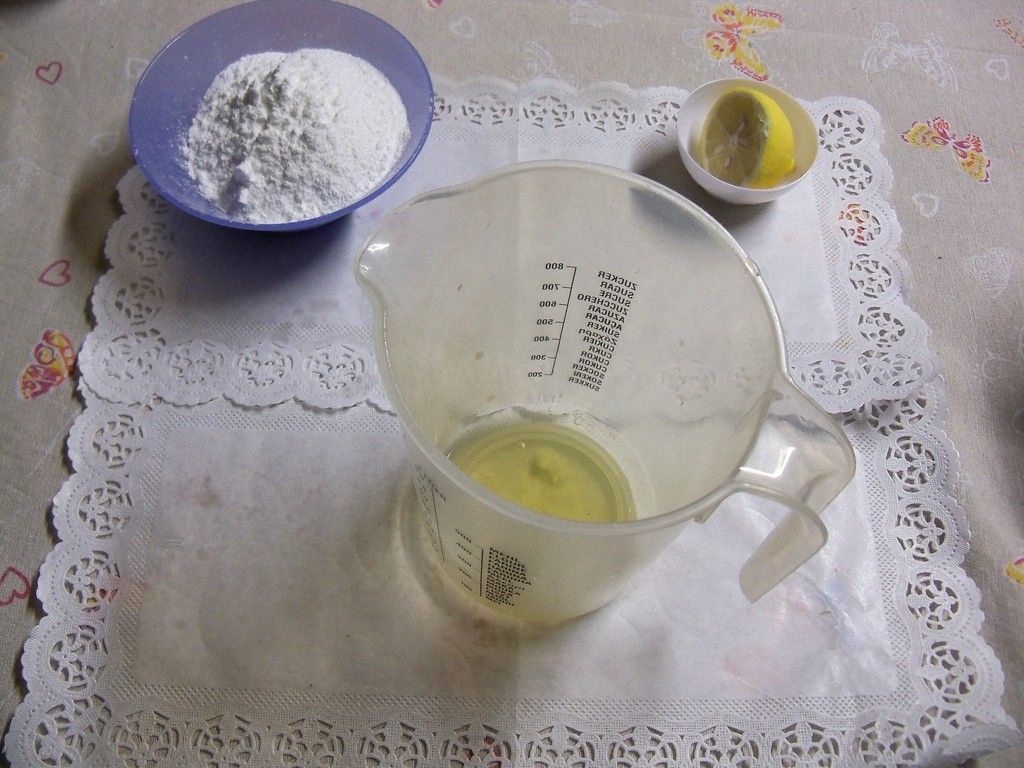
For the batter you will need:
120 gr all purpose flour;
120 gr butter (warm);
120 gr butter (warm);
120 gr sugar;
2 eggs;
1 teaspoon of yeast;
a pinch of salt.
a pinch of salt.
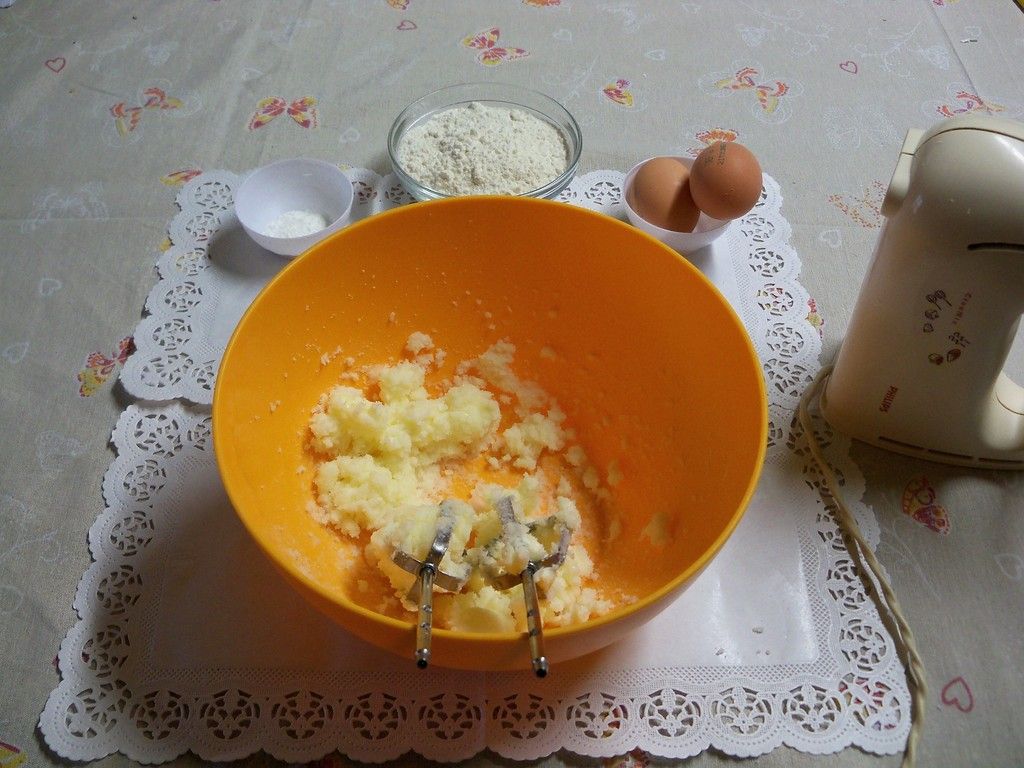
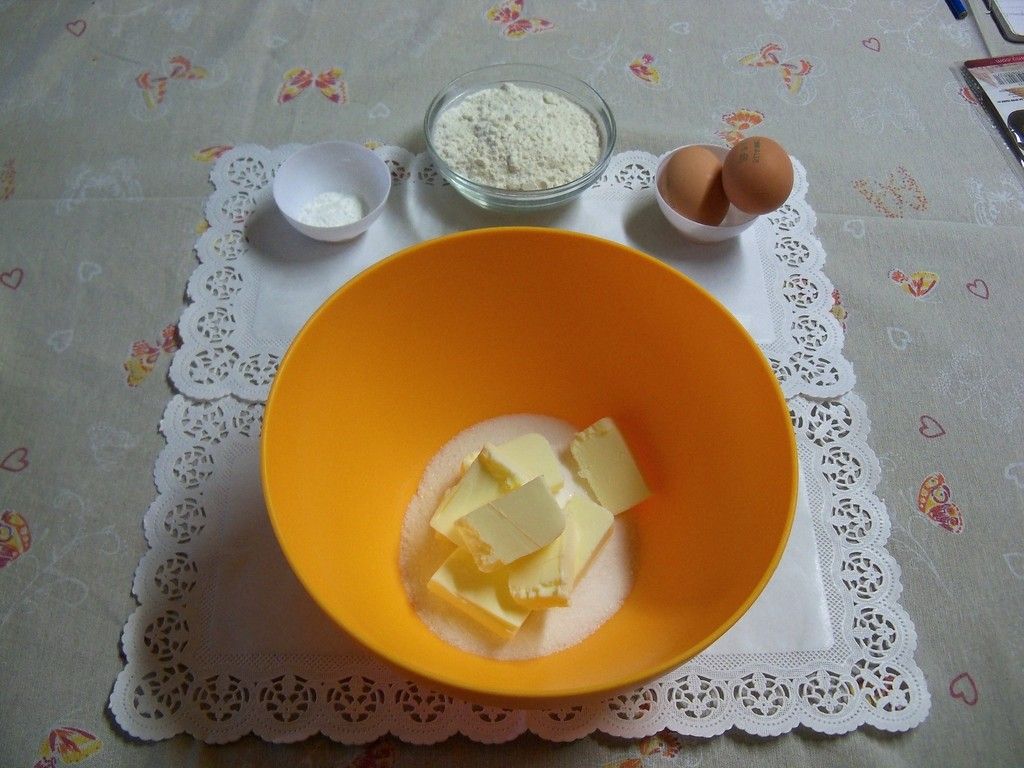
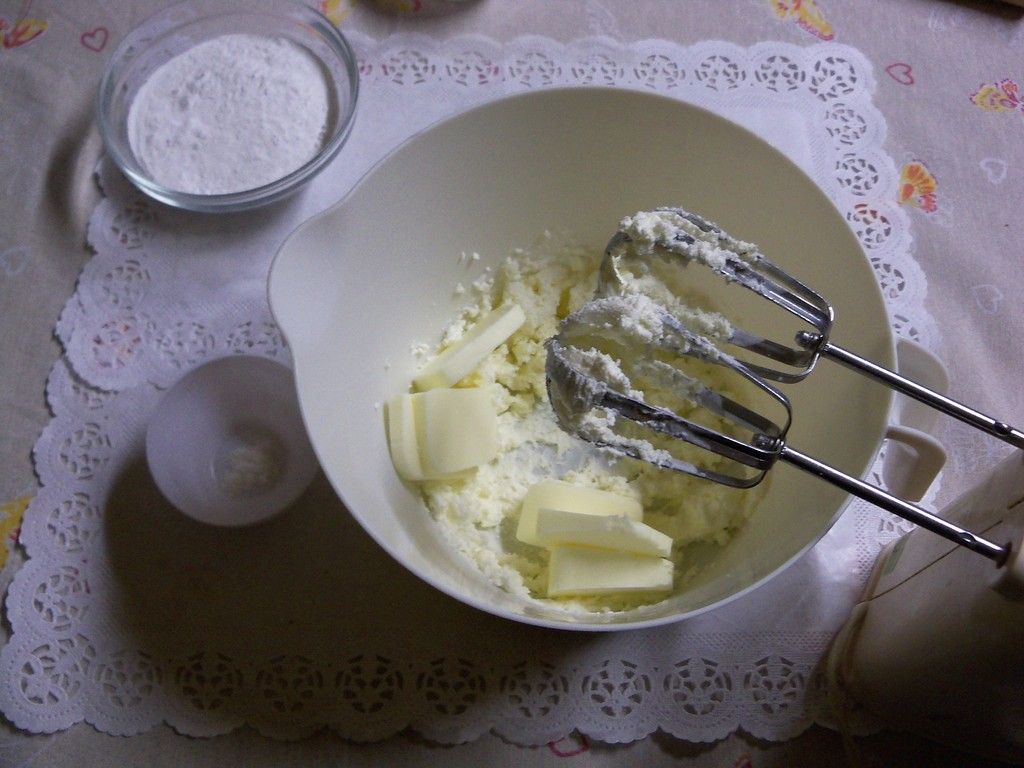
First thing first:
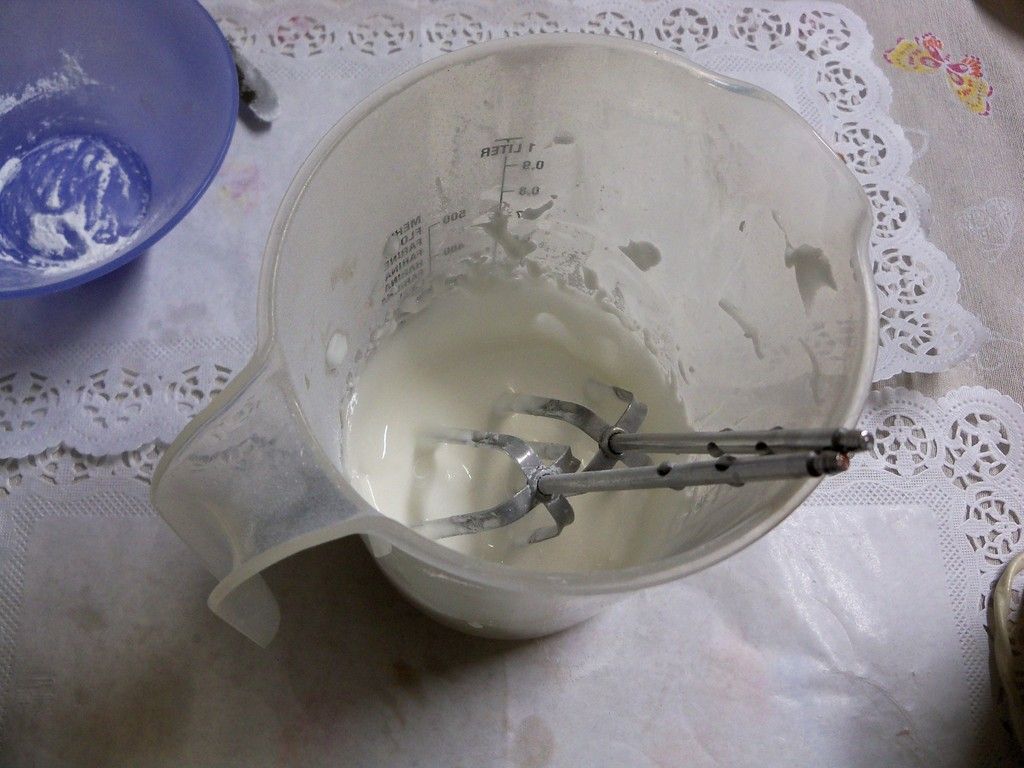
let's mix the butter and sugar until creamy.

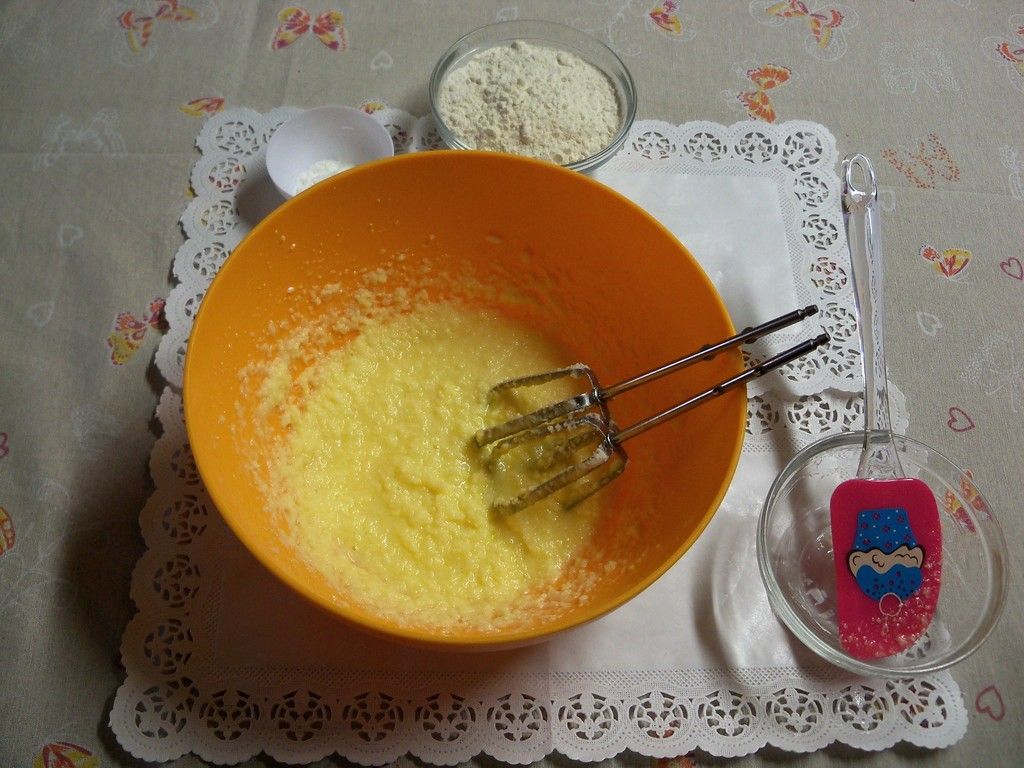
And beat up the eggs in the mixture.
Look how cute my spatula is, mom bought me just for this tutorial!
Best mom 2k15.
Look how cute my spatula is, mom bought me just for this tutorial!
Best mom 2k15.
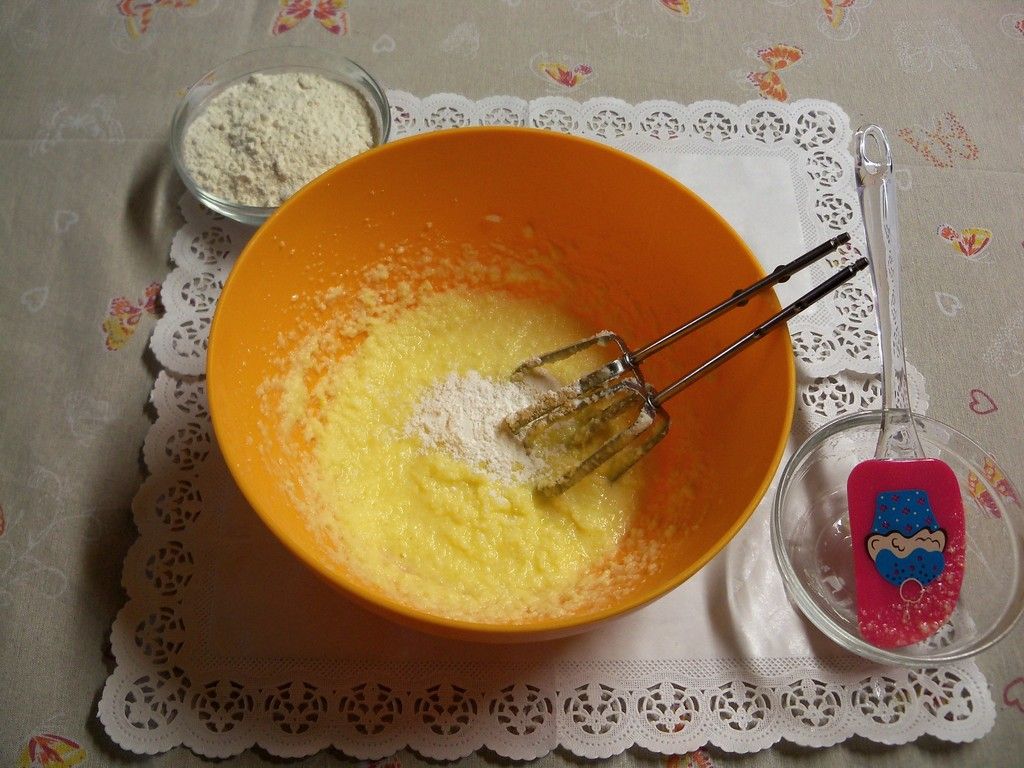
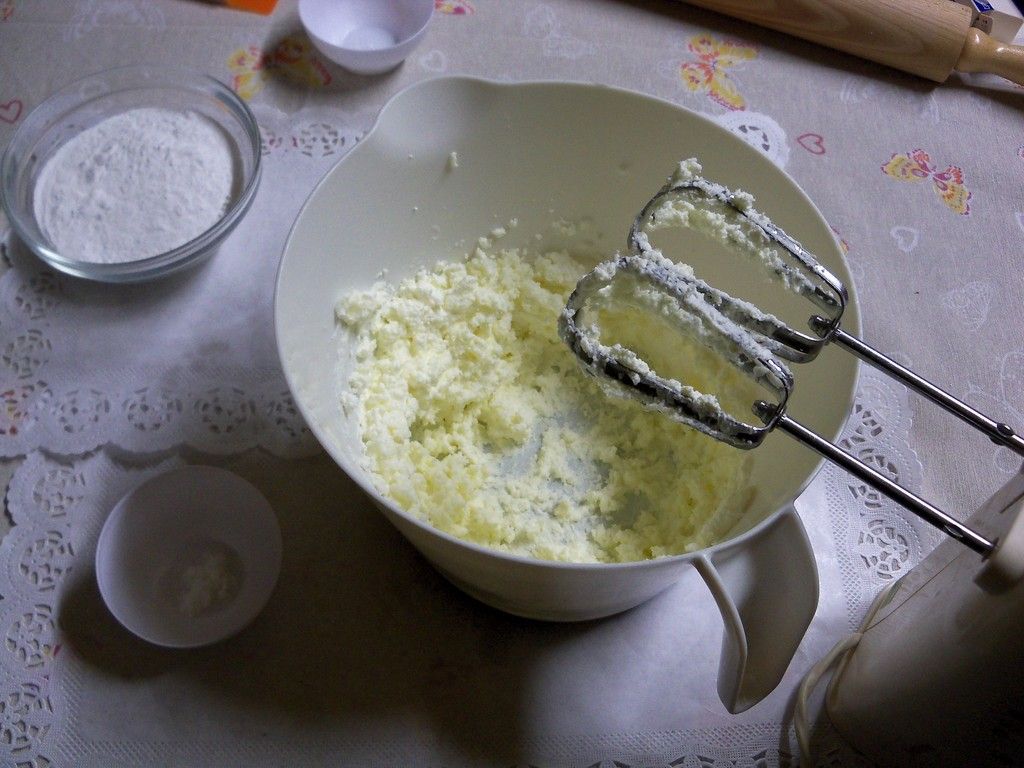
Now I mix in the yeast and the salt.
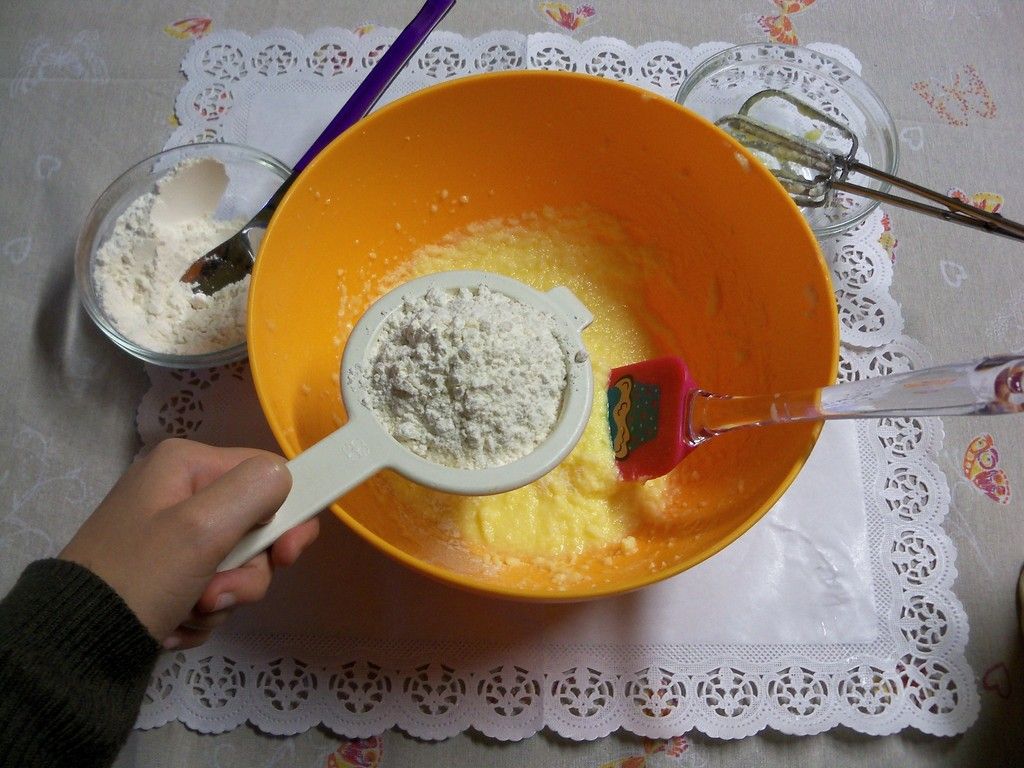
Last but not least, I sift in the flour.
My sifter is small, better use one a bit bigger if you can!
My sifter is small, better use one a bit bigger if you can!
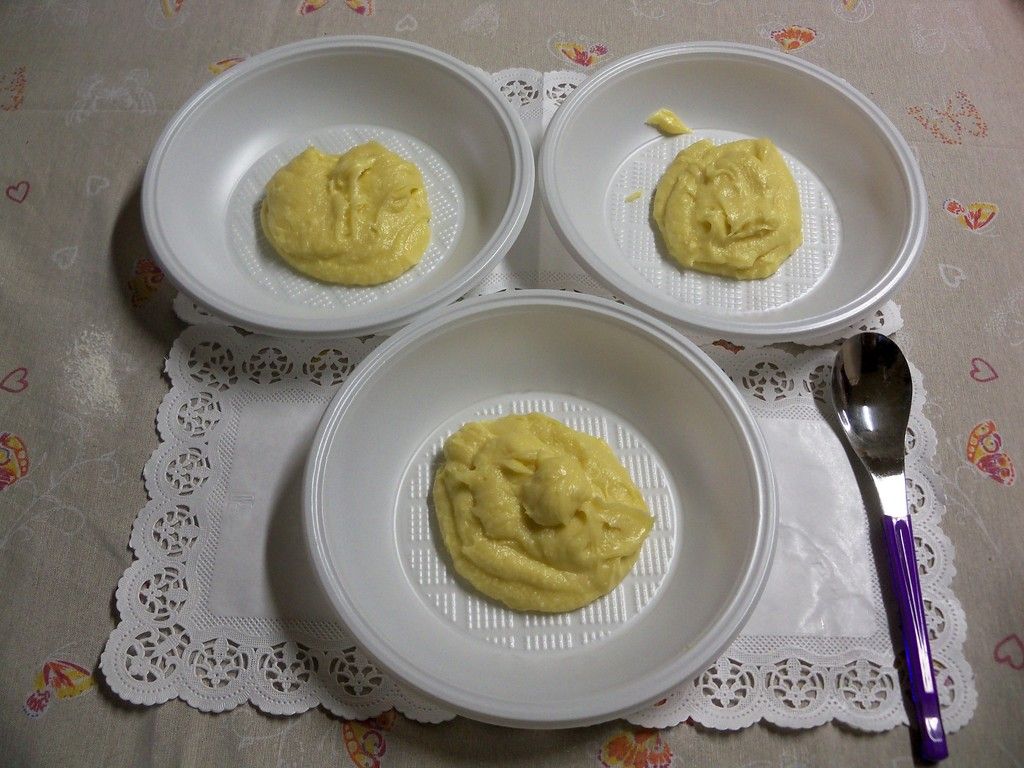
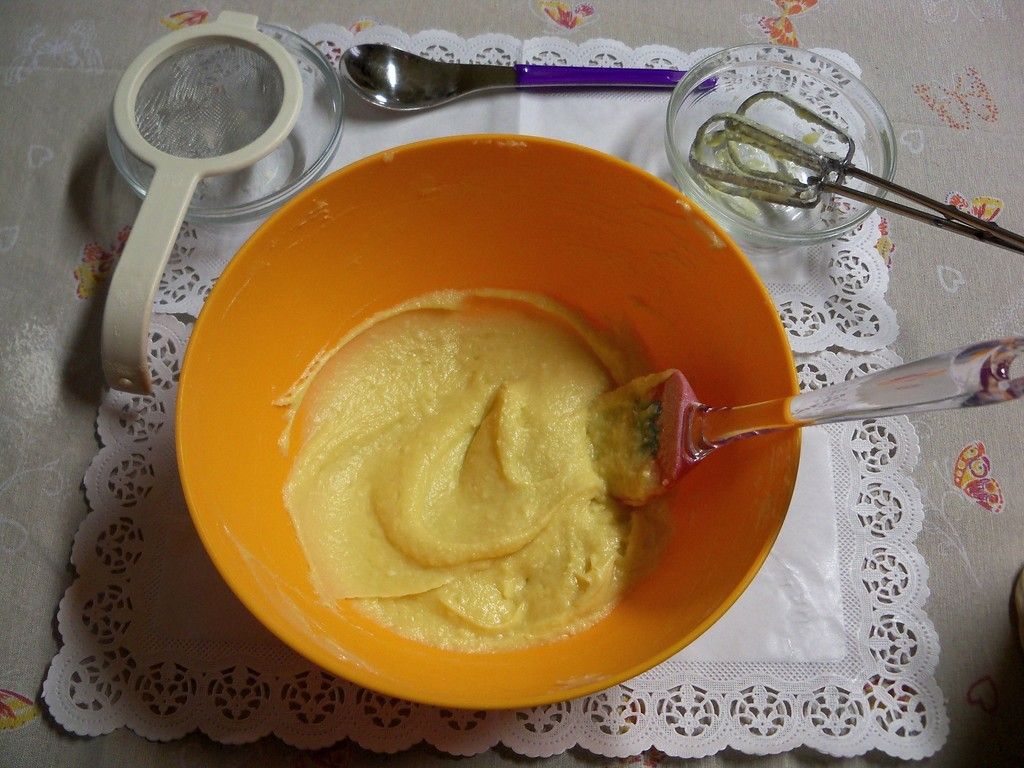
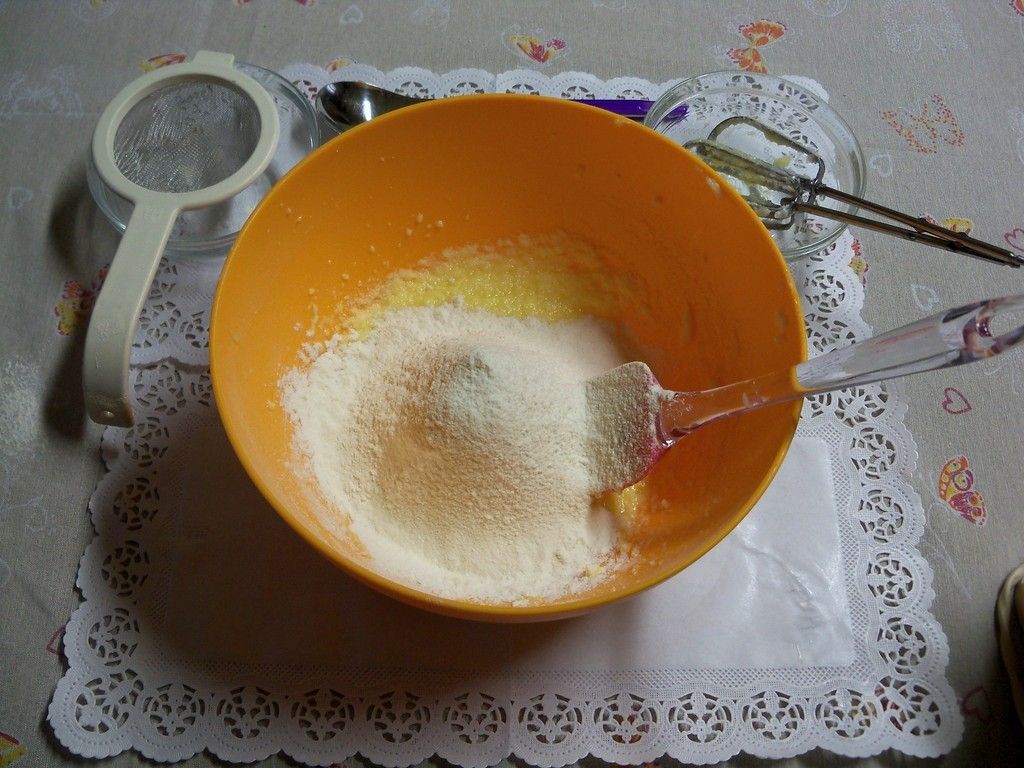
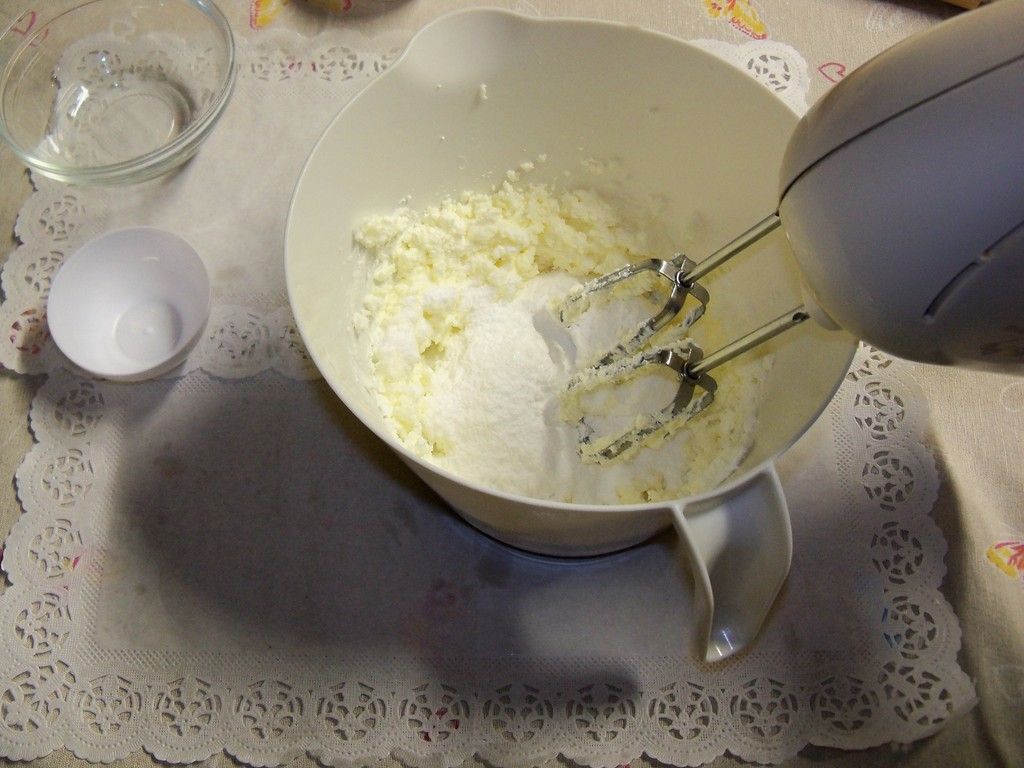
When the batter is all well mixed I split it into three, for my three different cupcake!

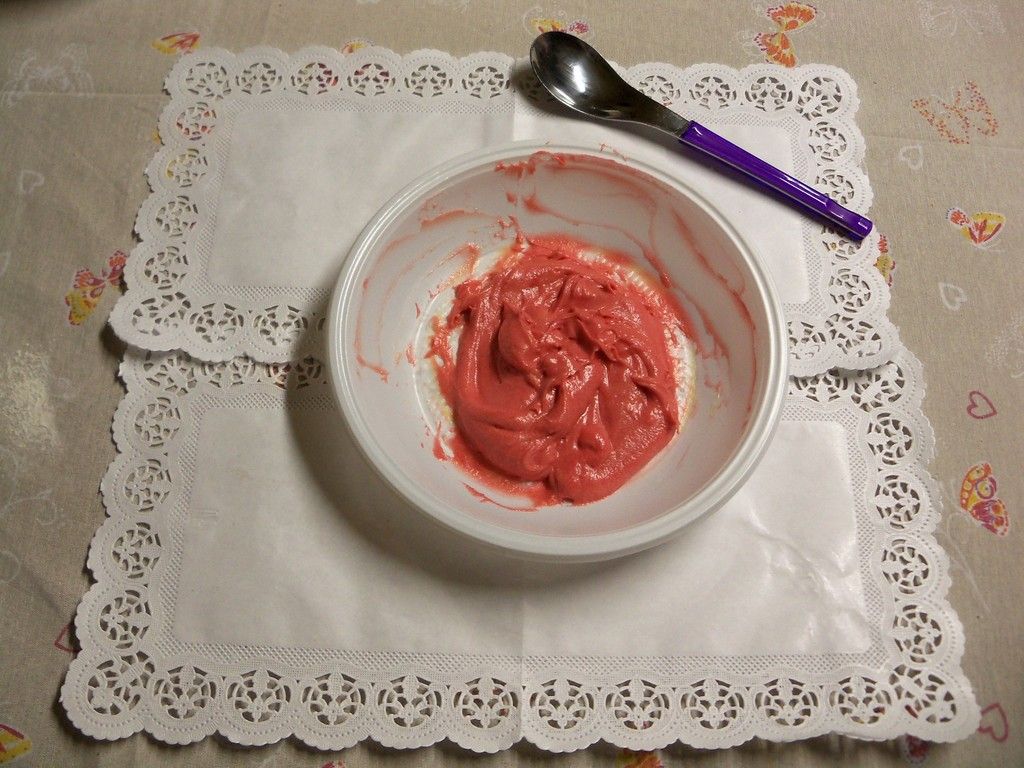
This one, the eye one, will be red velvet like!
So add to the batter a spoon full of red colorant to make it brigth red.
Have in mind that the batter will make it more pink, but when it'ill be cooked the color will be red.
So add to the batter a spoon full of red colorant to make it brigth red.
Have in mind that the batter will make it more pink, but when it'ill be cooked the color will be red.
Onto the backing part!
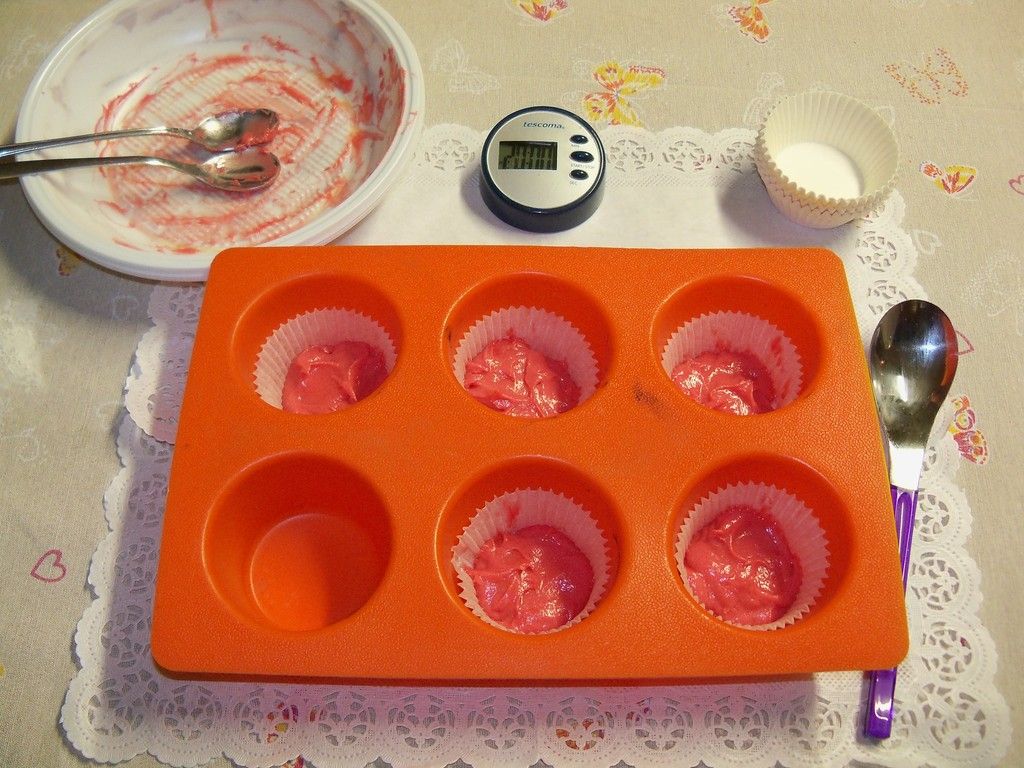
Line up a cupcake pan with paper liners firs!
Take a teaspoon and fill with the batter half of the paper liner, not to much!
Or it will overflow during the baking, we don't want that to happen right?
When you've finished all the batter, put the pan in the oven at 180 C for 20 minutes.
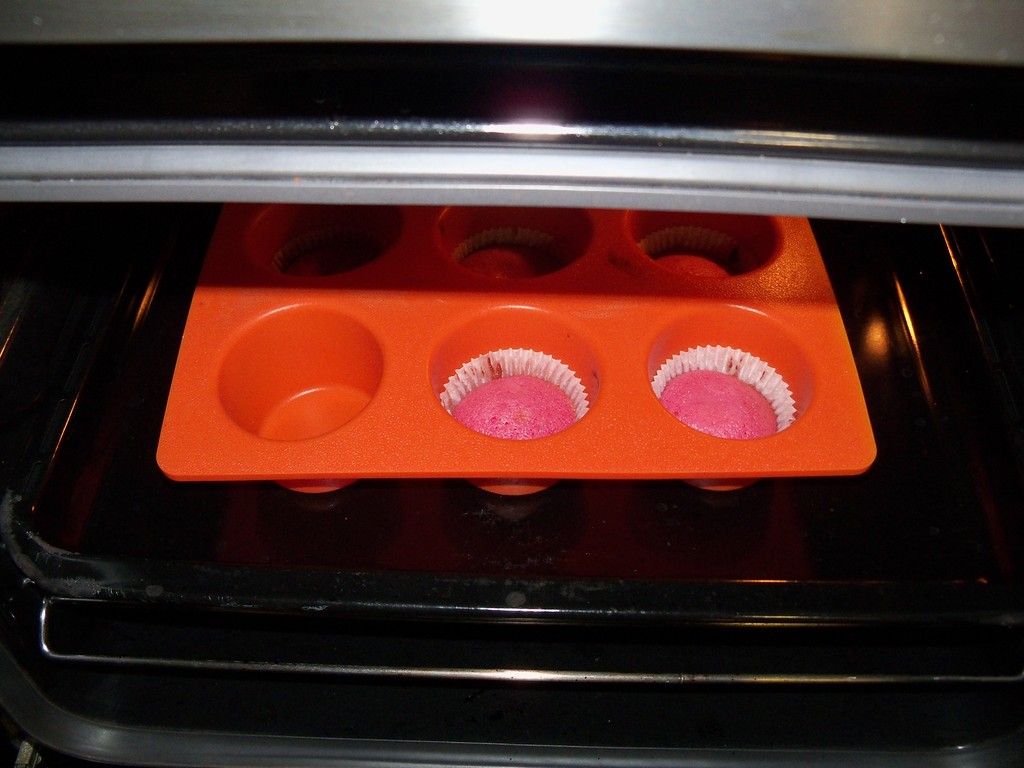
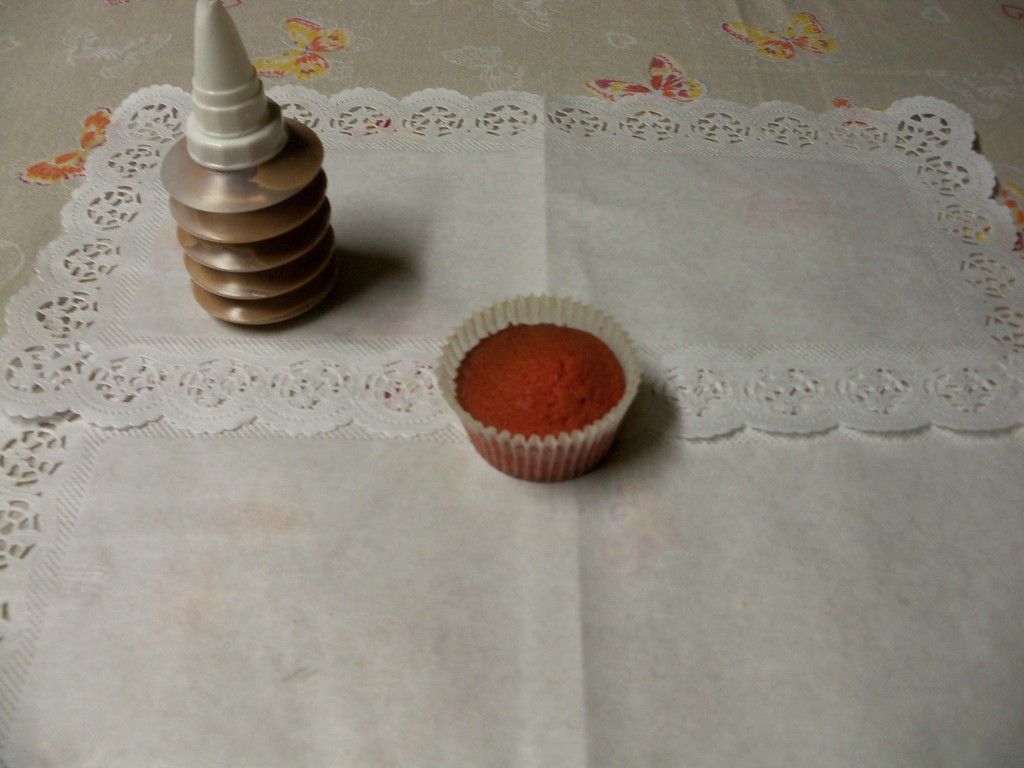
BUM. THE PINKEST RED VELVET IN TOWN, THANK YOU FLASH!

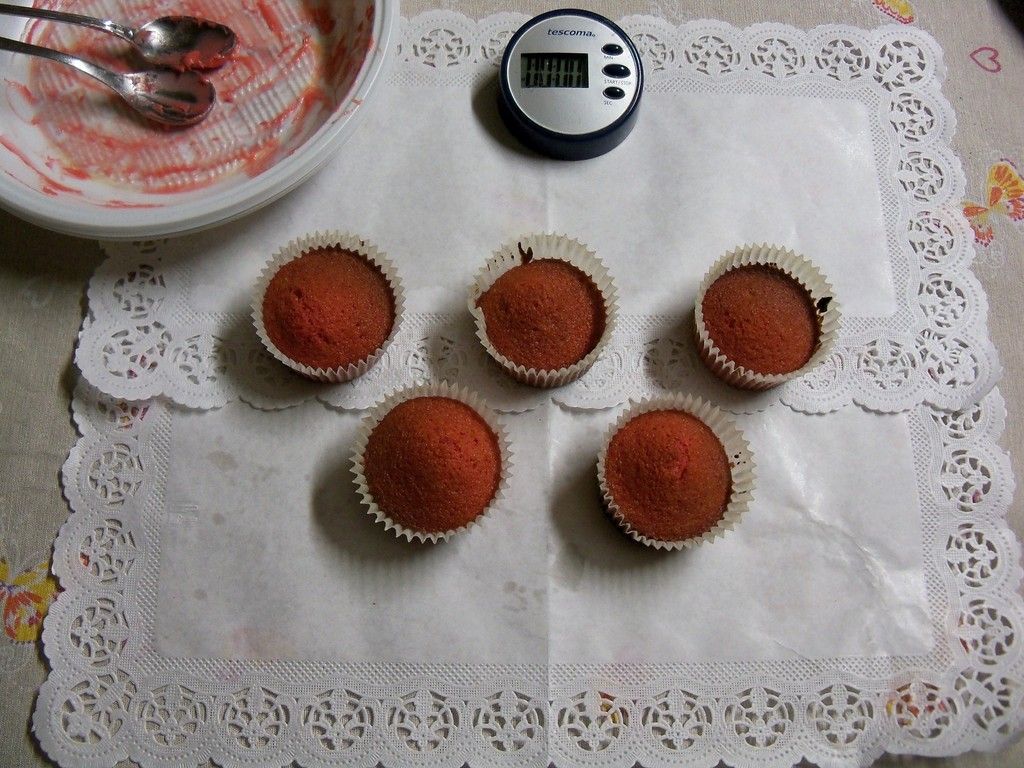
Take them out of the pan and let them cool completely.
It's important to have them really cold, or the decoration will melt away!
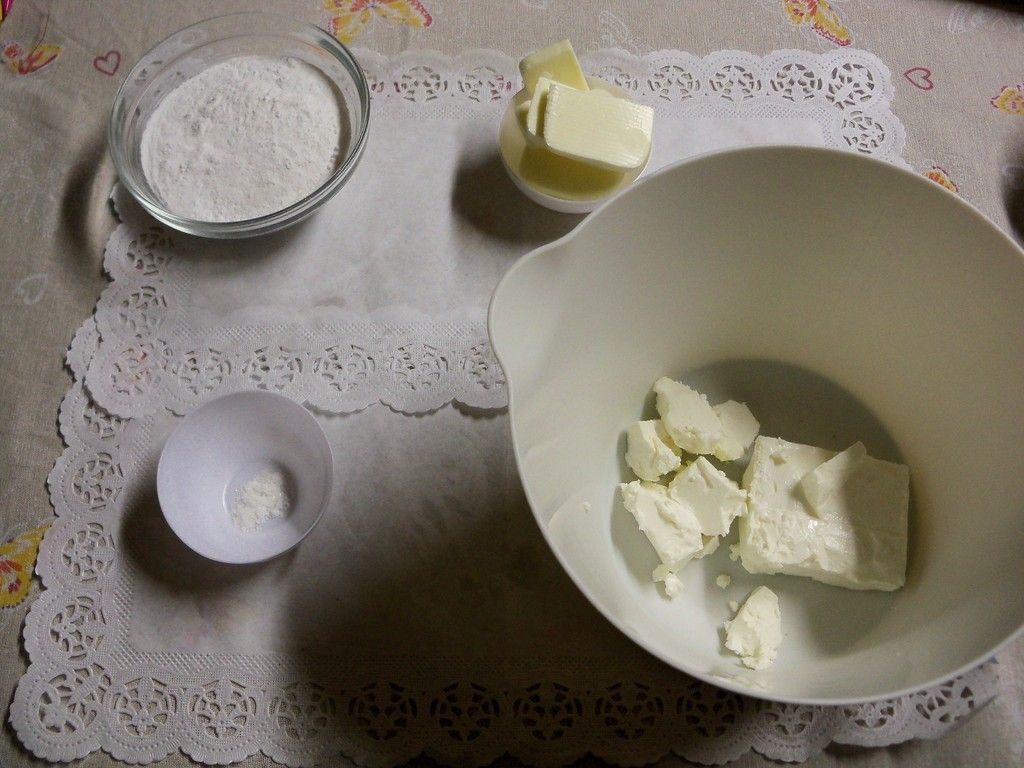
Now, the cream!
This frosting is different from the mascarpone cheese one, but it's with philadelphia!
It's more like a cheesecake to the flavor and consistency.The ingridients are:
120 gr philadelpia cheese;
60 gr butter (refrigerated);
some vanilla powder;
95 gr icing sugar.

And then the icing sugar and the vanilla. Mix really well!
Divide it into two and take one of the parts.
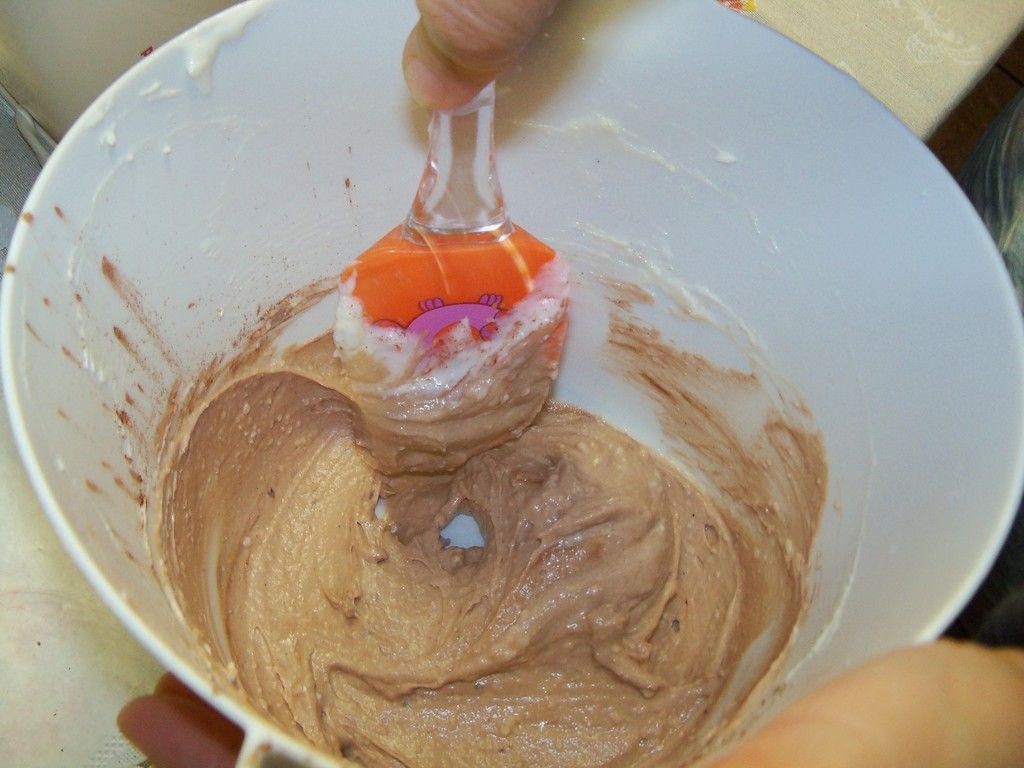
Add some cocoa powder to color it and you're done!
Let it cool in the fridge until we will frost the cupcake!
Let's do the little horn coockies!
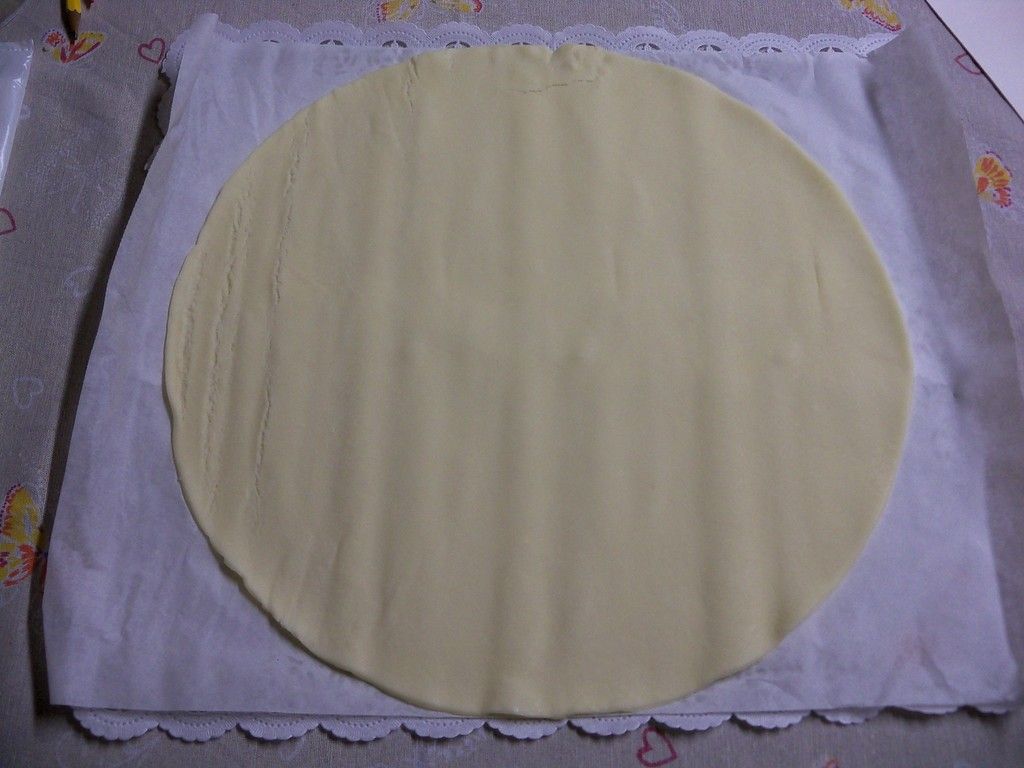
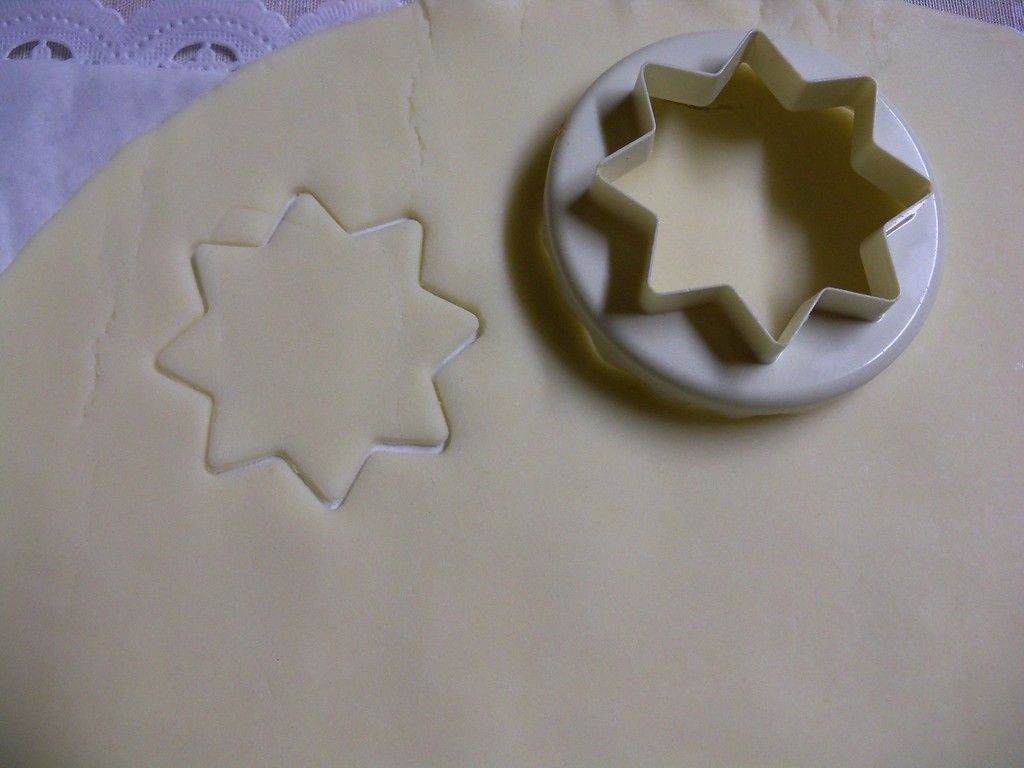
I've used pre-made crust from the supermarket, and then cut it into pointy stars.
If you have the 5 point star cookie cutter is better!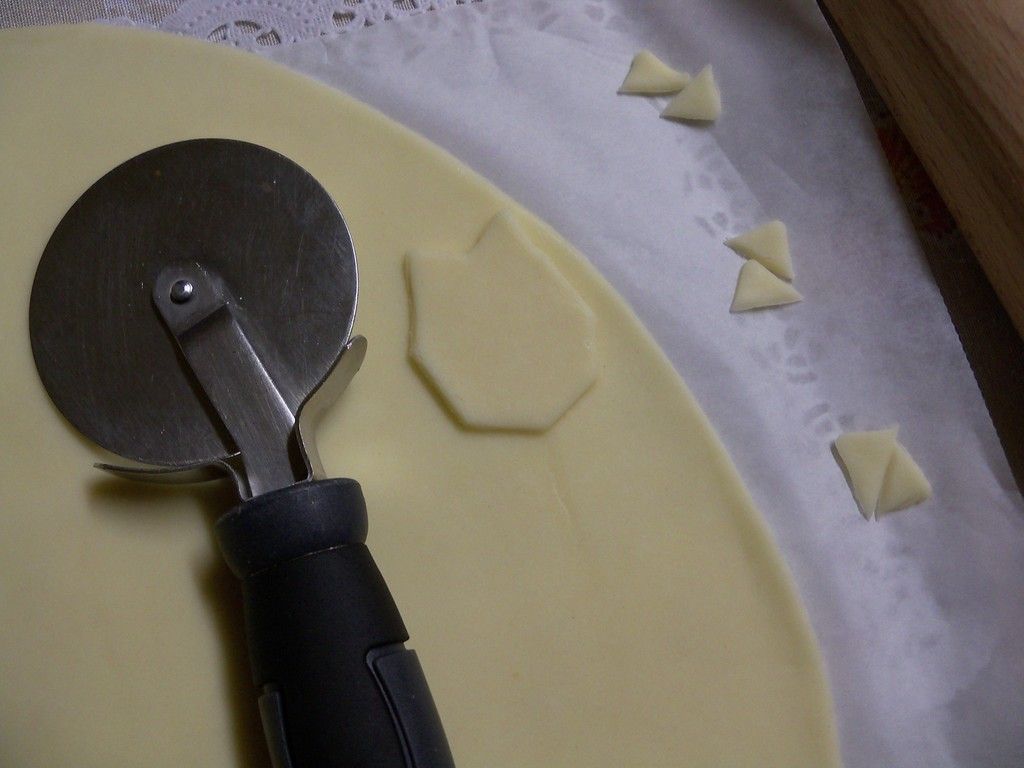

As you can see I have really little horns, with the 5 star cookie cutter you will have a better result.
You will need 3 pairs of horn, 6 pieces in total.
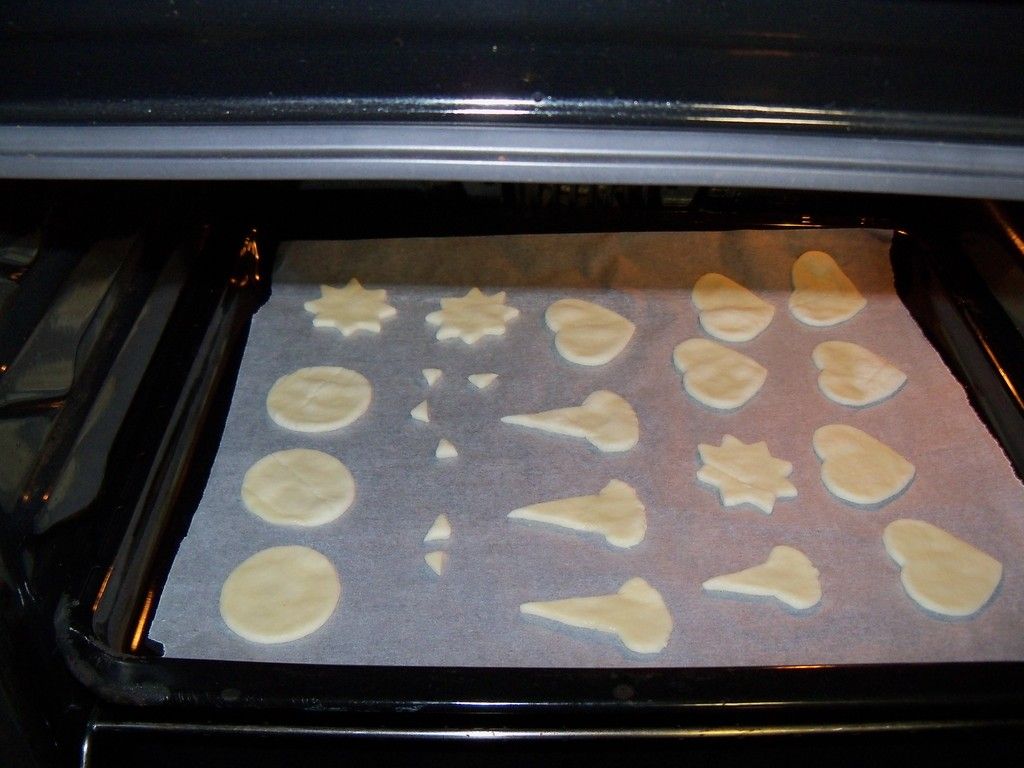
Let them bake for a bit, 5-10 minutes, when they're brown they're ready.
Royal icing time!
This time you will need:
150 gr of icing sugar;
1 egg white;
1 egg white;
some drops of lemon juice.


Start by adding to the egg the lemon juice.
Then whip up the egg white until stiff peaks form.
Lastly add the sugar little by little, while mixing.
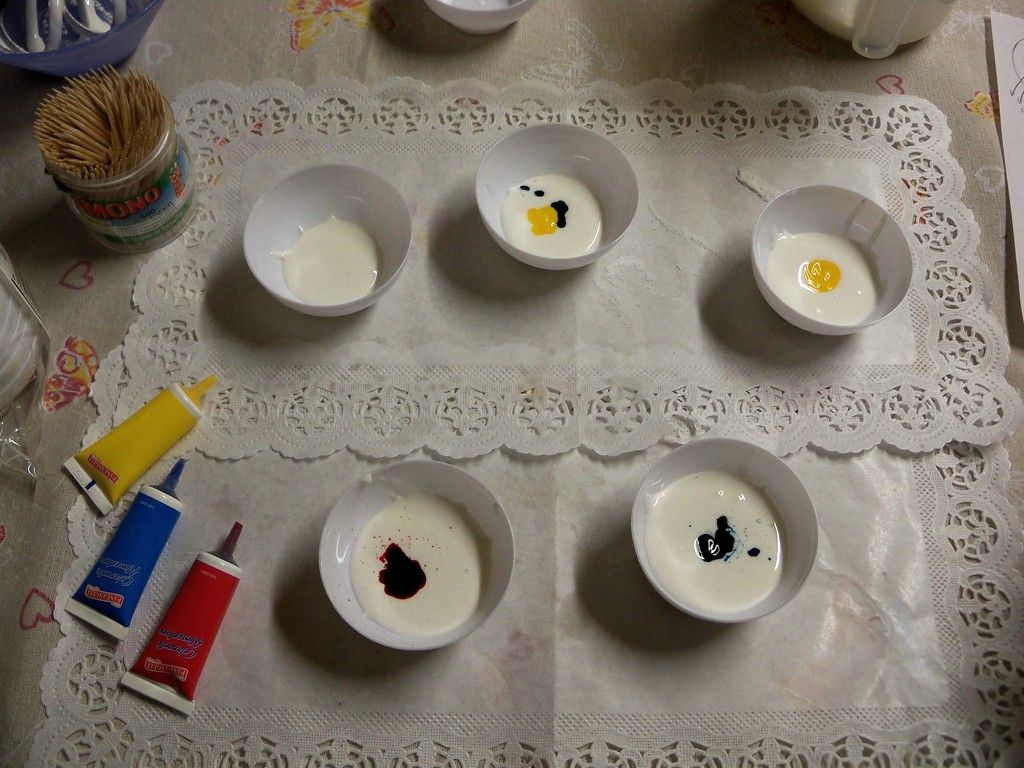

Now that the icing is complete you can divide it into small container and colour it!
For the horn we will need only the red icing.
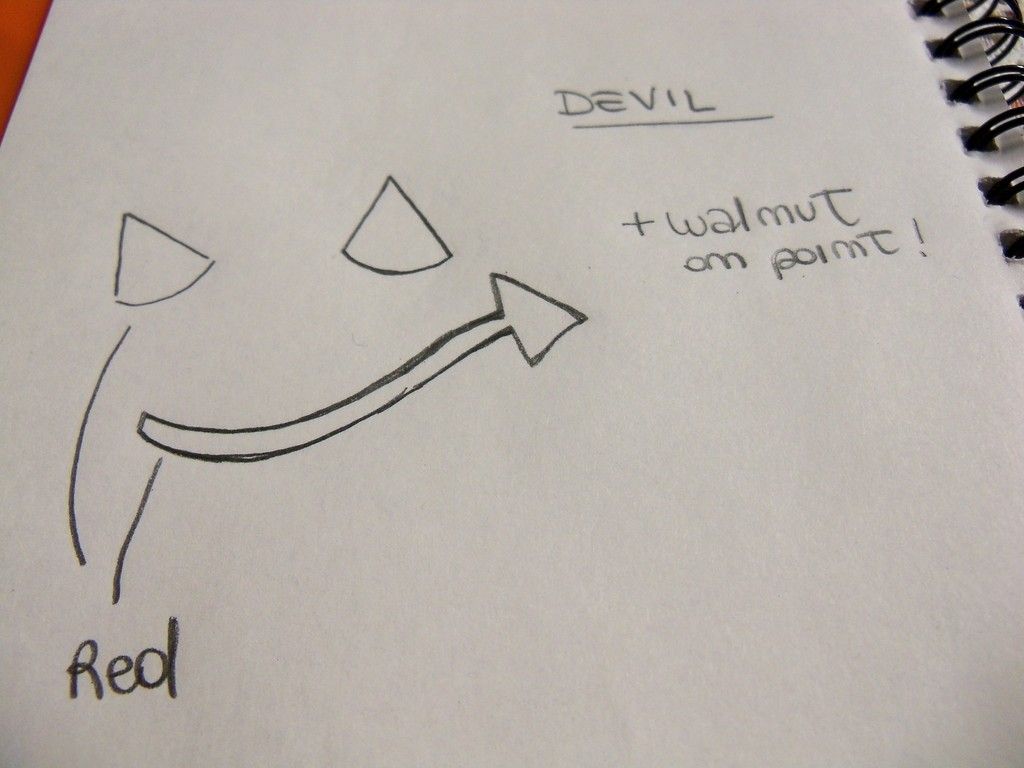
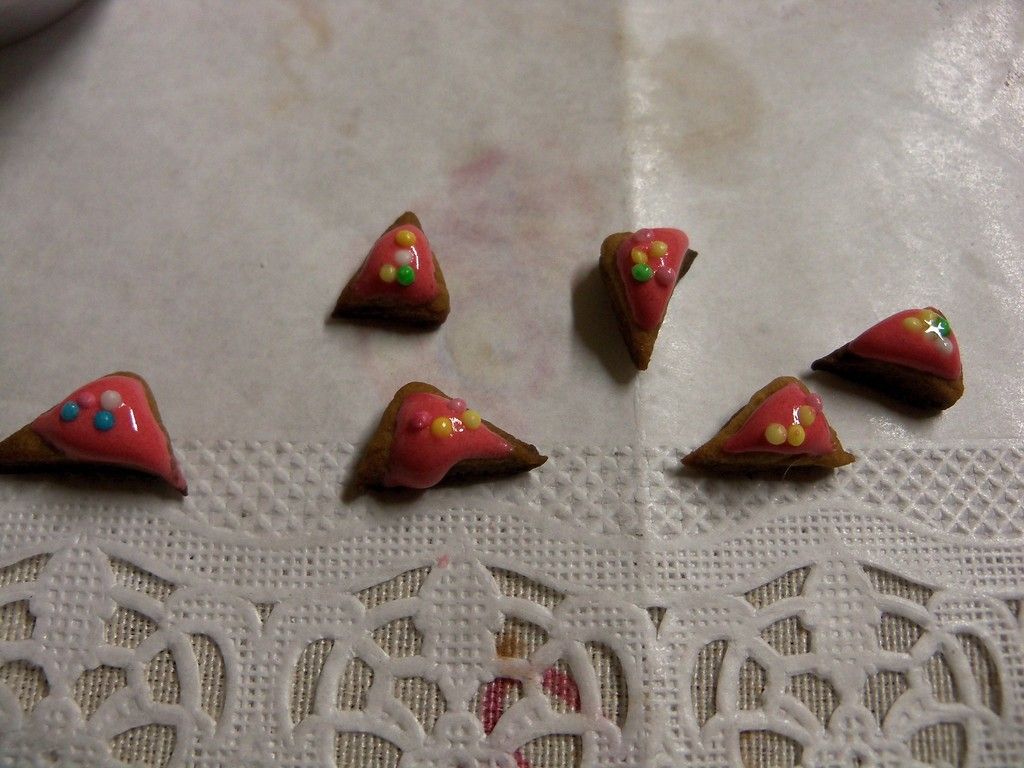
As you can see in my first concept I wanted to make some tails too, but they would be too little in real and so I discarded the idea.
I just put a blop of red color on the cookie and some sprinkle on the top part.
Shiny!
Lastly, decorating everything!
First prep up all you will need:
the cupcakes;
the philadelpia with cocoa cheese frosting in a pastry bag;
some round sprinkles;
the philadelpia with cocoa cheese frosting in a pastry bag;
some round sprinkles;
the horn cookie.
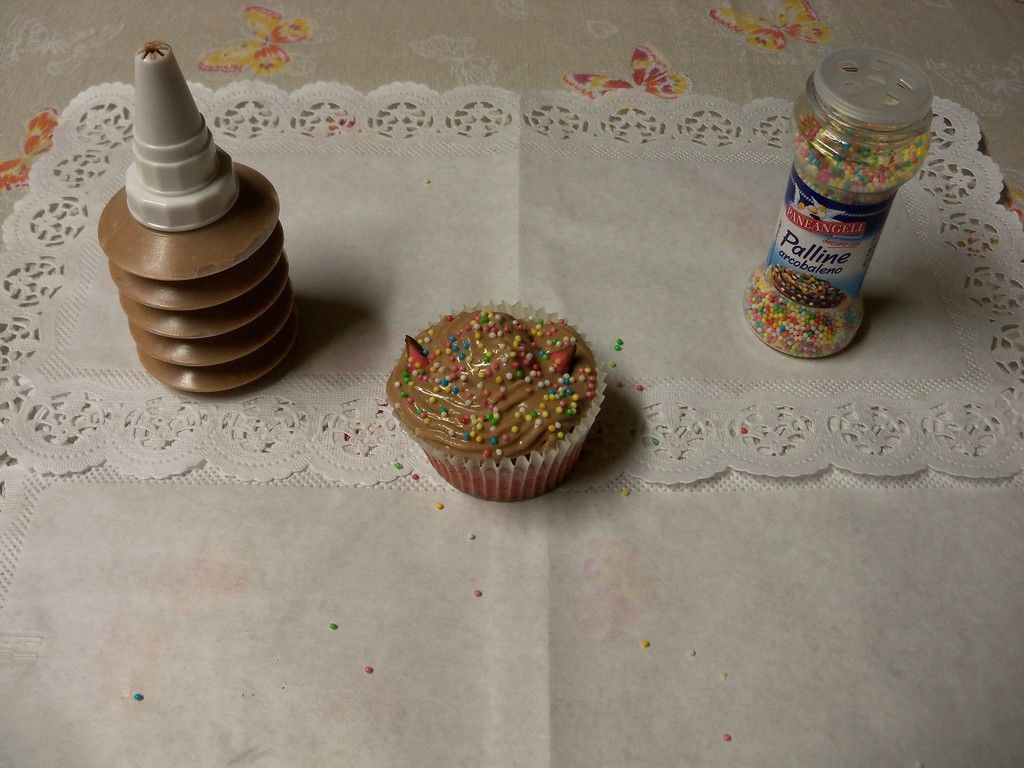

Add the cream on top of the cupcake with a smaller "star" tip this time.
Add many round sprinkes as a decoration and the cookie on top.
DONE!
Add many round sprinkes as a decoration and the cookie on top.
DONE!
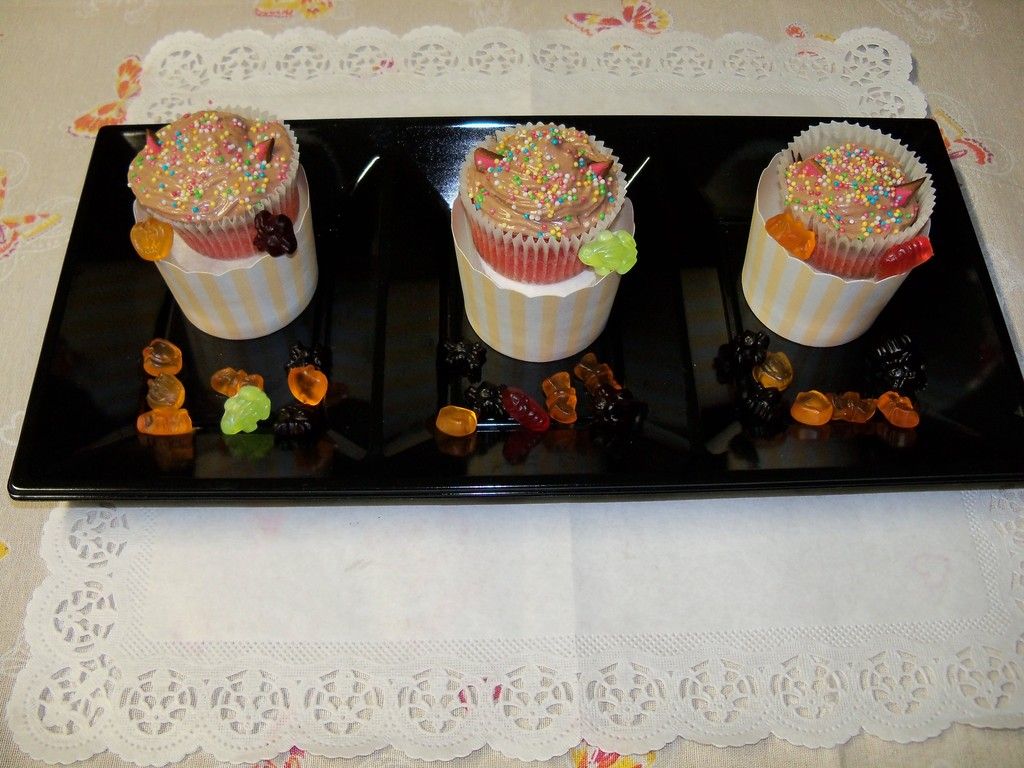
Your devil cupcakes are done!
This were easier than the other one, aren't they?
But they look cute nevertheless!
But they look cute nevertheless!
You can make this with little children, they will have so much fun!
See you next week for the "WITCH" cupcake!
A little note before the end:
I made this 3 different cupcake in the same day, so the ingredients are for ALL THREE cupcake together! If you want just one kind you need to SPLIT the dosage in 3, or making more cream and cookies! Or better even better...
I made this 3 different cupcake in the same day, so the ingredients are for ALL THREE cupcake together! If you want just one kind you need to SPLIT the dosage in 3, or making more cream and cookies! Or better even better...
Wait for the next week and try them all!
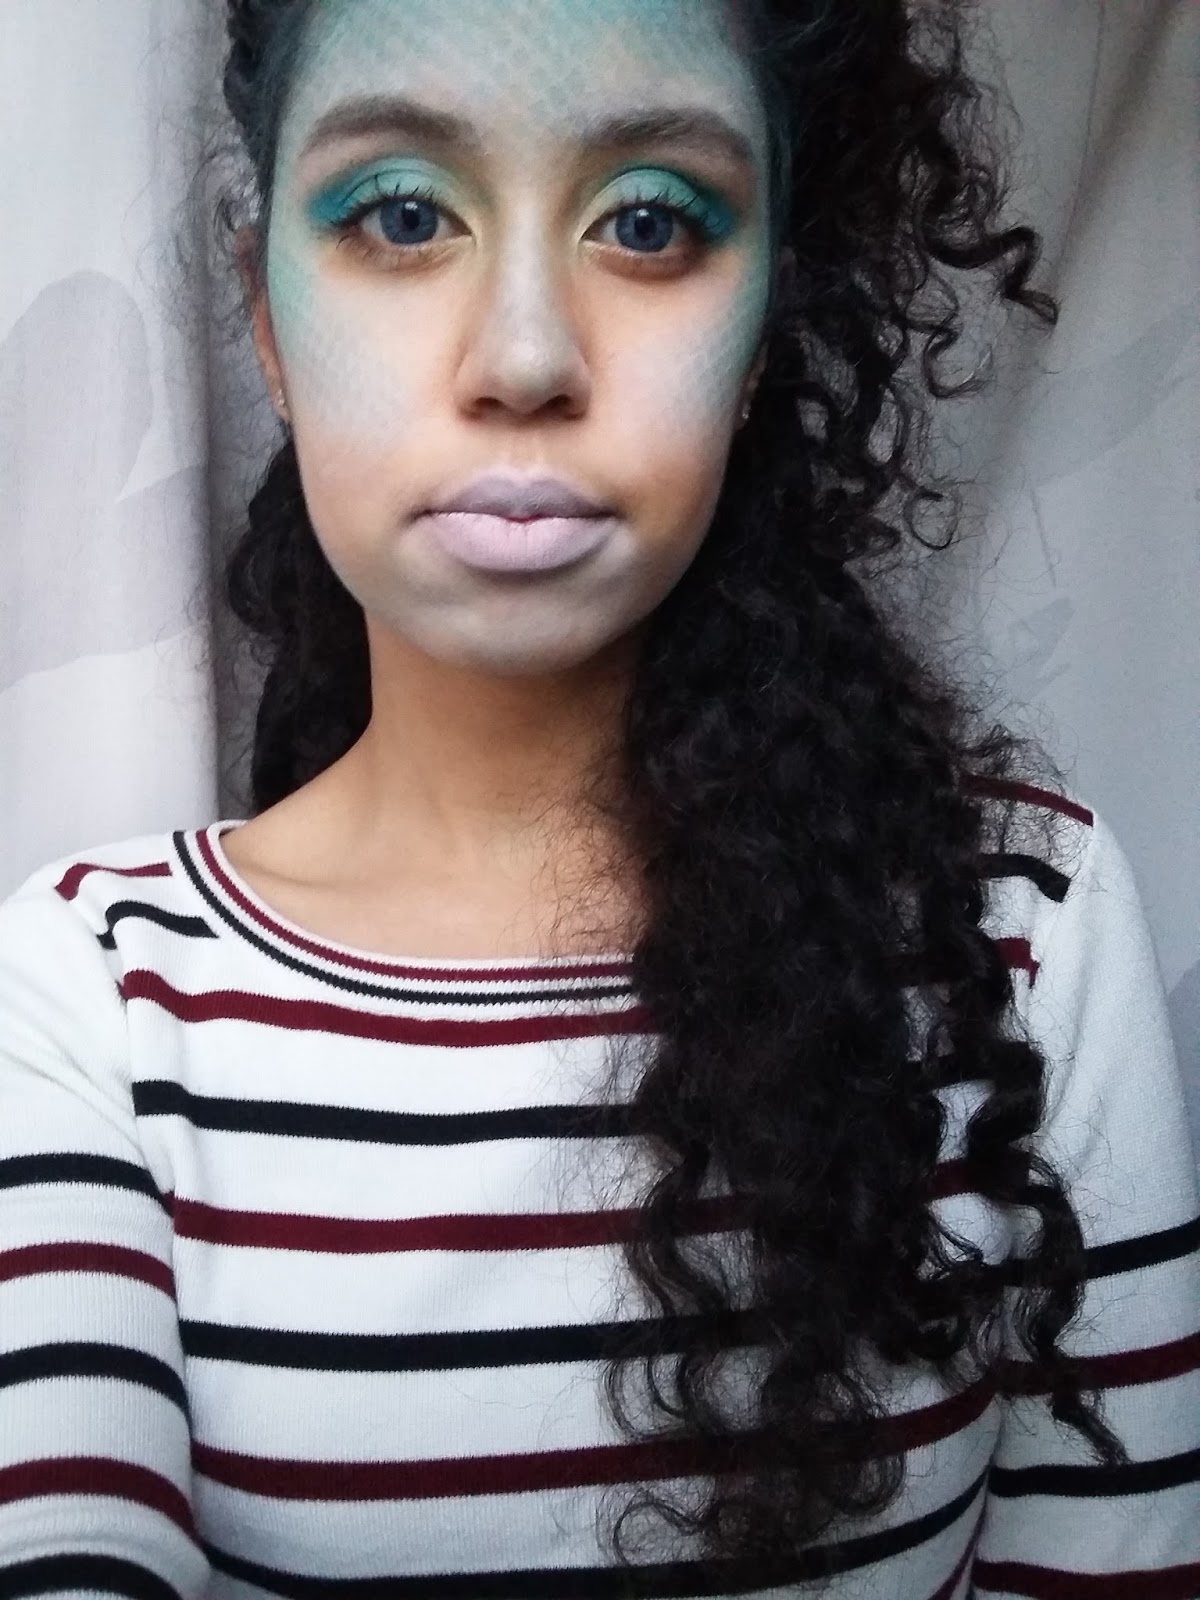
MAKE UP by IRETH

This week I'll show you how to make this sea creature inspired make up~
Hope you'll enjoy it!
|
|
||||
|
|
||||
|
|
||||
|
|
||||
|
|


 |
 |

Nessun commento:
Posta un commento