
Hi darlingsss! Welcome to the last week of tutorials to celebrate Halloween!
Have you got all the pumpkins ready? Are your brooms ready to fly? Your costumes are done?
(This last point talks to me as this week is Lucca Comics&Games' week and we all know I haven't finished my cosplay yet lol)
Enjoy ! Tell us also what you think about them, what was you favourite of the 3 weeks?
And don't forget to tag #cosplayaesthetic if you try one of them!

OUTFIT by EIREENENE
Have you got all the pumpkins ready? Are your brooms ready to fly? Your costumes are done?
(This last point talks to me as this week is Lucca Comics&Games' week and we all know I haven't finished my cosplay yet lol)
Enjoy ! Tell us also what you think about them, what was you favourite of the 3 weeks?
And don't forget to tag #cosplayaesthetic if you try one of them!
OUTFIT by EIREENENE

For the last week outfit, I've come with a daily wonderful t-shirt+leggins pair. Just the thing you will wear everyday, but cooler. The prints give to the tshirt that one up score, and the leggins with the fake holes are the perfect match! The coat is to warm you up a bit, and it's in that black and red squares that everyone is crazy about for this winter! The platform are this year must, and this are the coolest for the cheapest price. As accessory, again a choker, I just enjoy that internet-fashion-style and this one kind reminds me of Sailor Moon? The price is once again gorgeous! The last item, which I fell in love with, is the silver brooch. You can wear it on the jacket, but actually I think it'll suit better the black of the t-shirt, or -if you're brave enough- the leggins!
TREATS by CYCLOVE

THIRD WEEK BEFORE HALLOWEEN WOO!
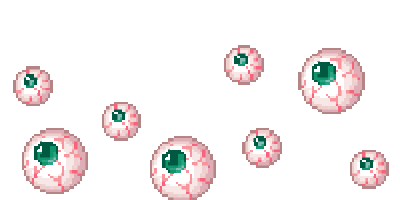
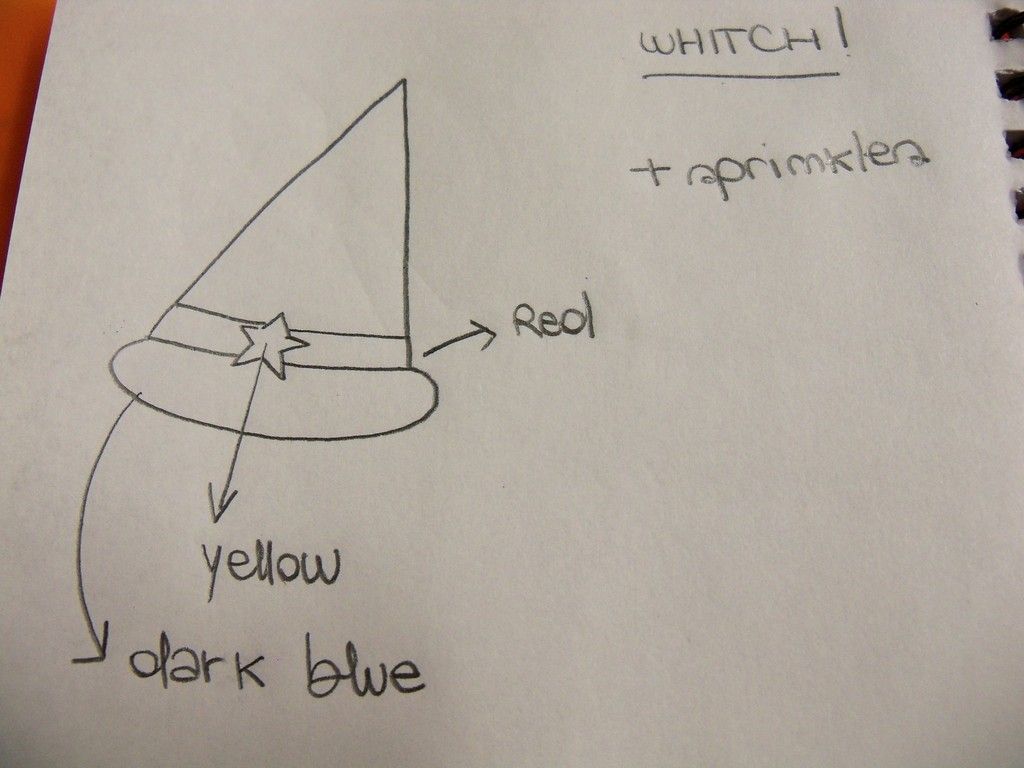
This week treat: WITCH. What's halloween without witches?
No halloween I tell you! So here they are, to make your celebration more magical!
Let's get started!
This week treat: WITCH. What's halloween without witches?
No halloween I tell you! So here they are, to make your celebration more magical!
Let's get started!
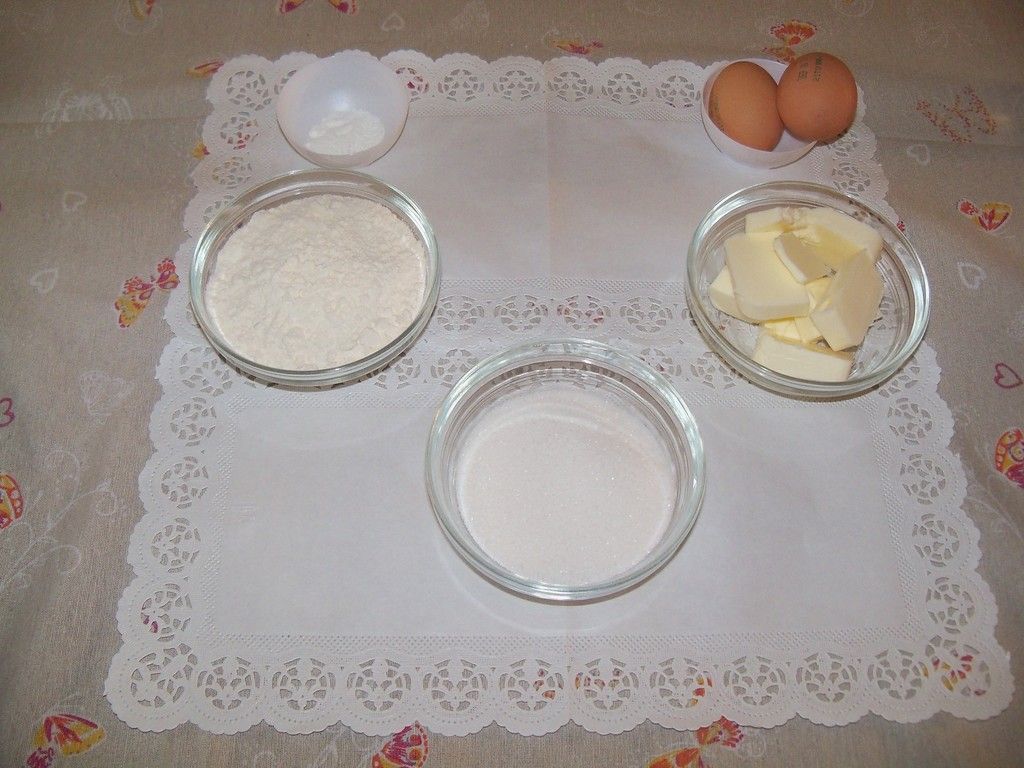
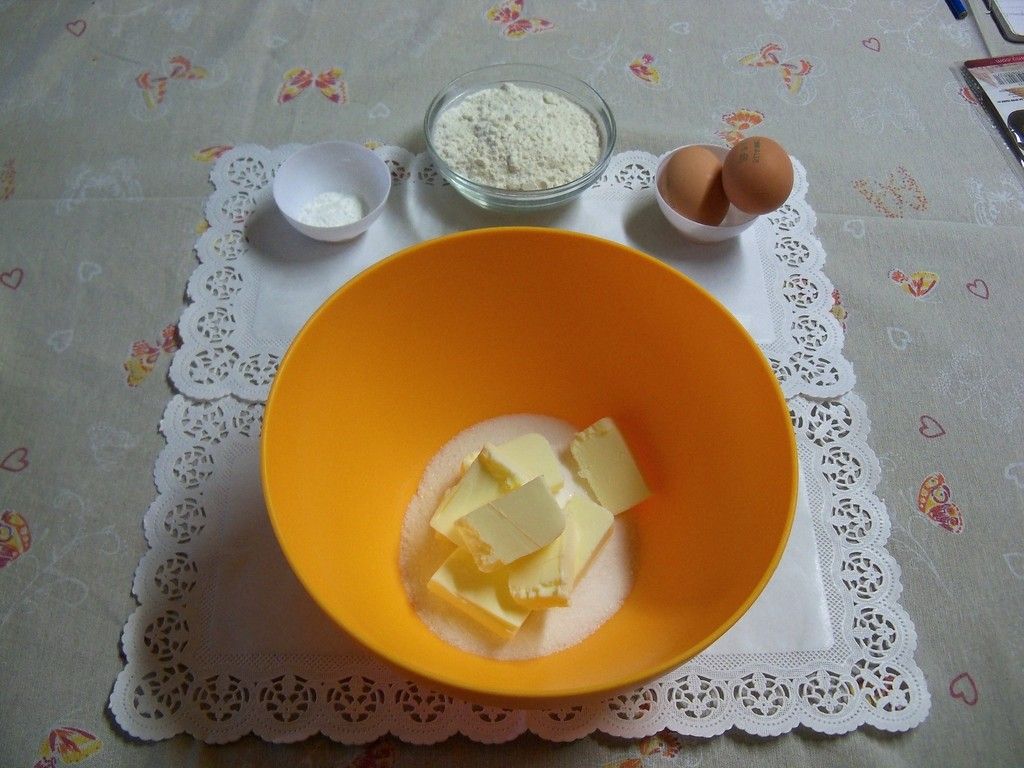
For the batter you will need:
120 gr all purpose flour;
120 gr butter (warm);
120 gr butter (warm);
120 gr sugar;
2 eggs;
1 teaspoon of yeast;
a pinch of salt.
a pinch of salt.
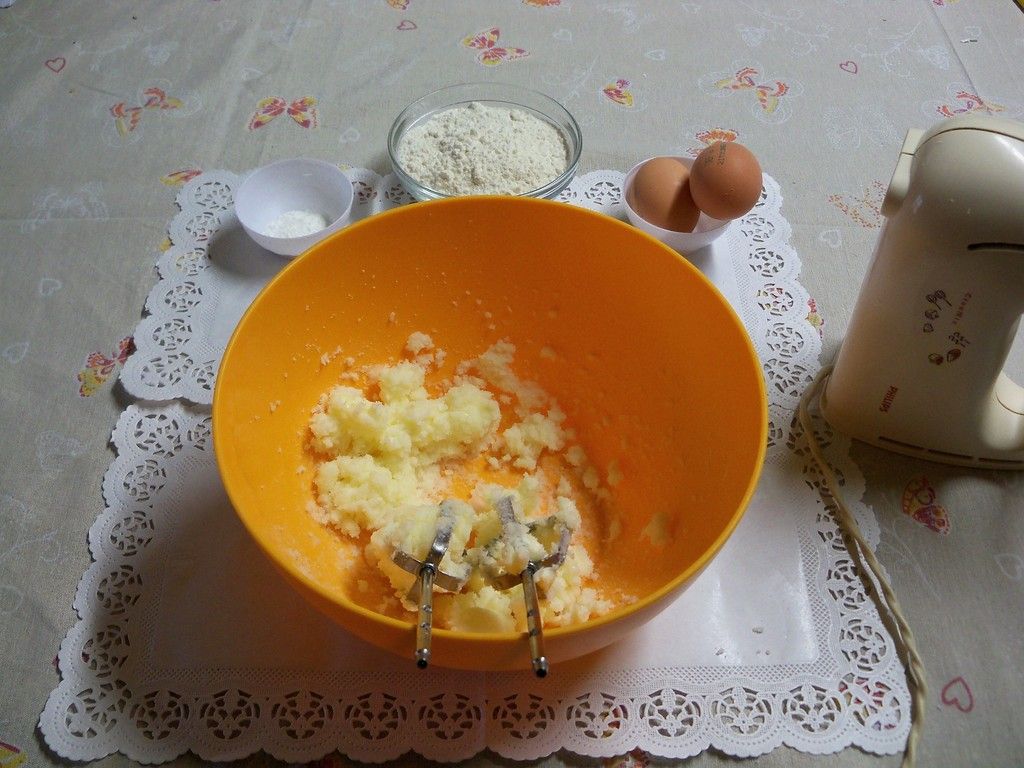
First thing first:
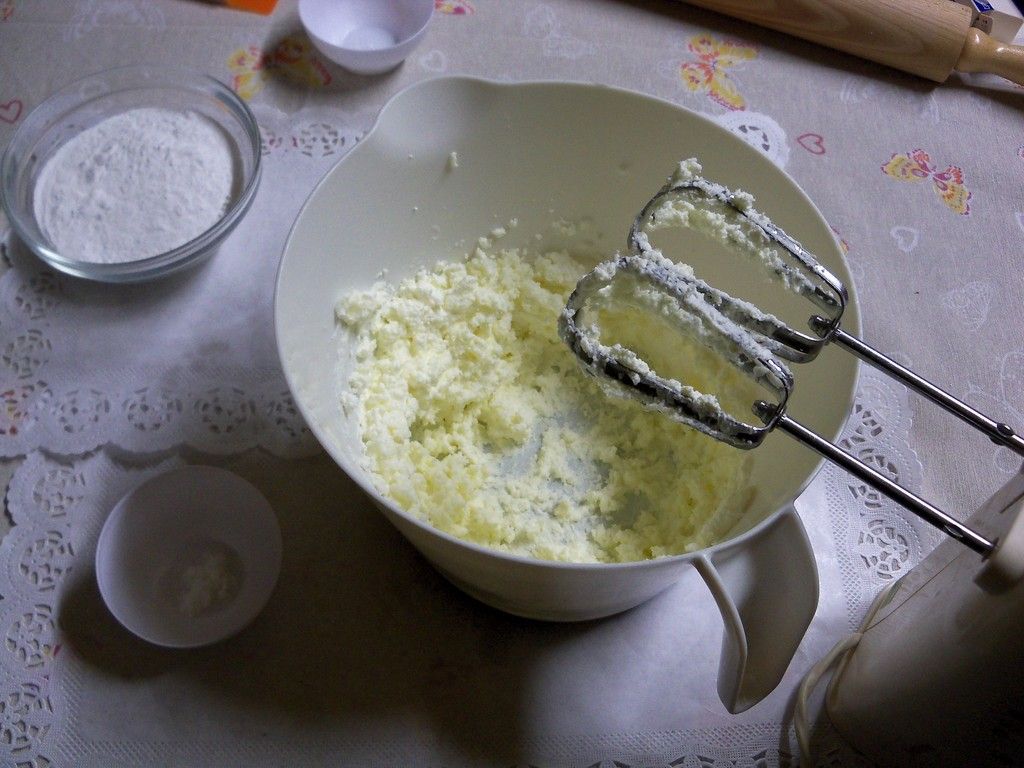
let's mix the butter and sugar until creamy.

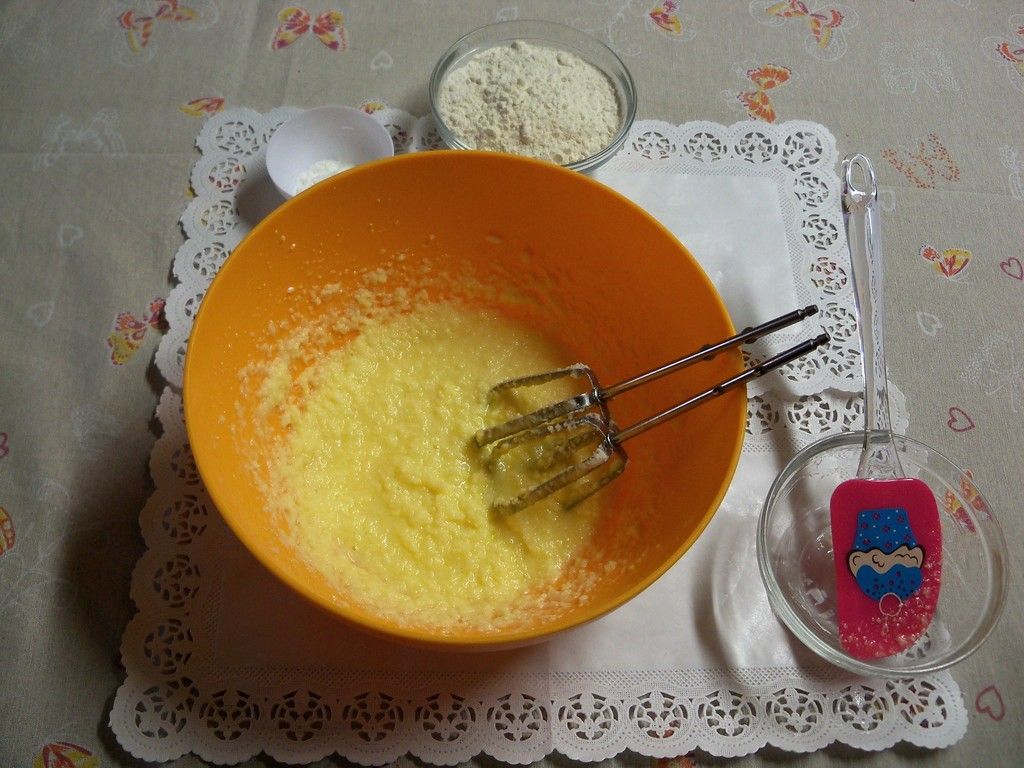
And beat up the eggs in the mixture.
Look how cute my spatula is, mom bought me just for this tutorial!
Best mom 2k15.
Look how cute my spatula is, mom bought me just for this tutorial!
Best mom 2k15.
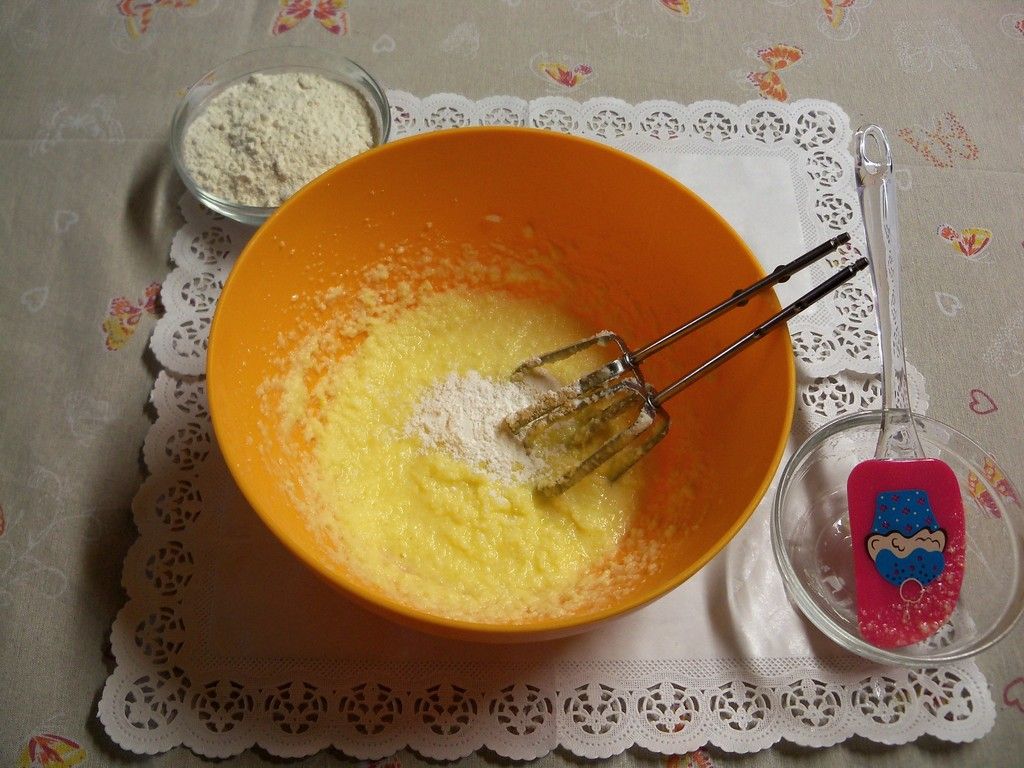
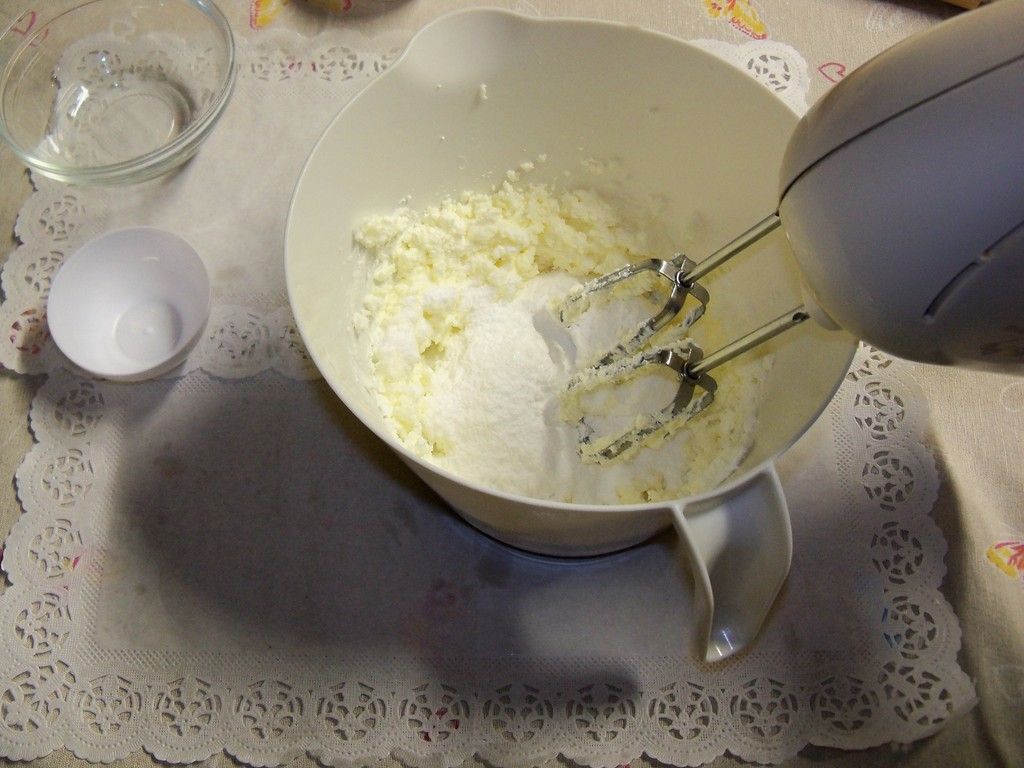
Now I mix in the yeast and the salt.
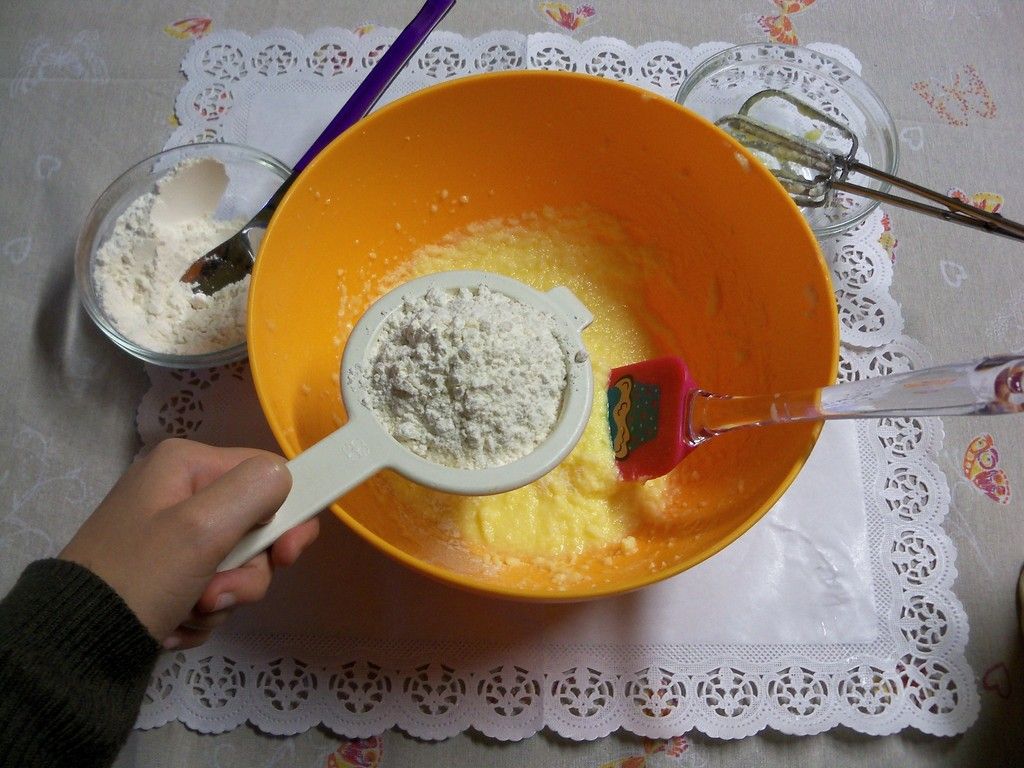
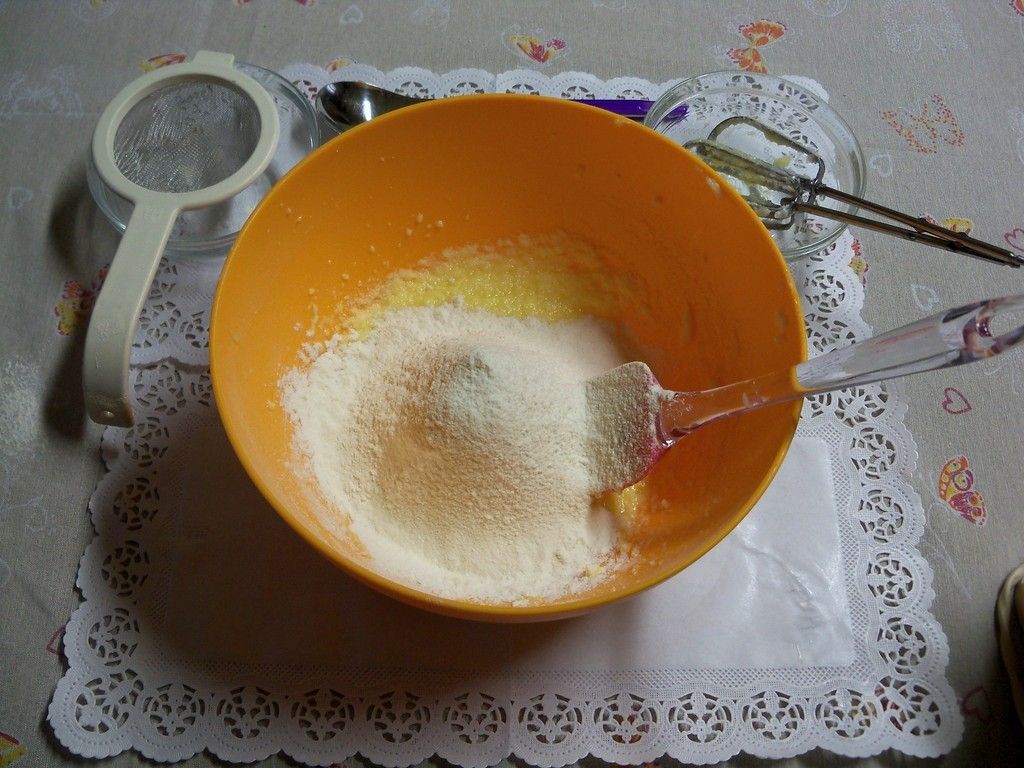
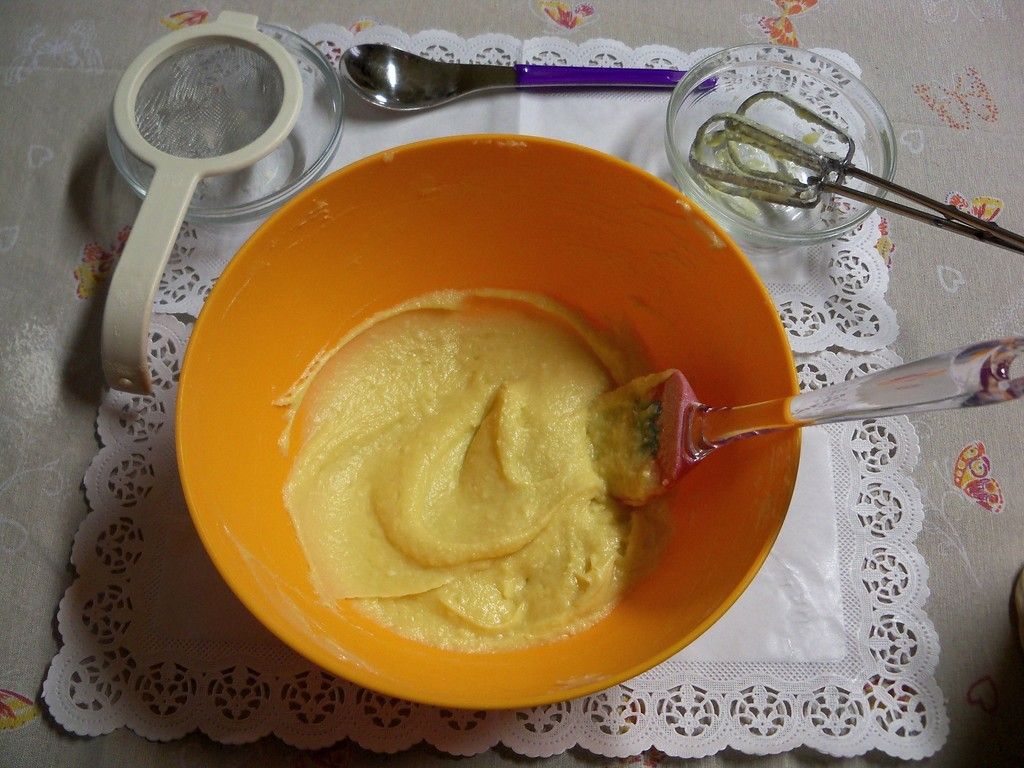
Last but not least, I sift in the flour.
My sifter is small, better use one a bit bigger if you can!
My sifter is small, better use one a bit bigger if you can!
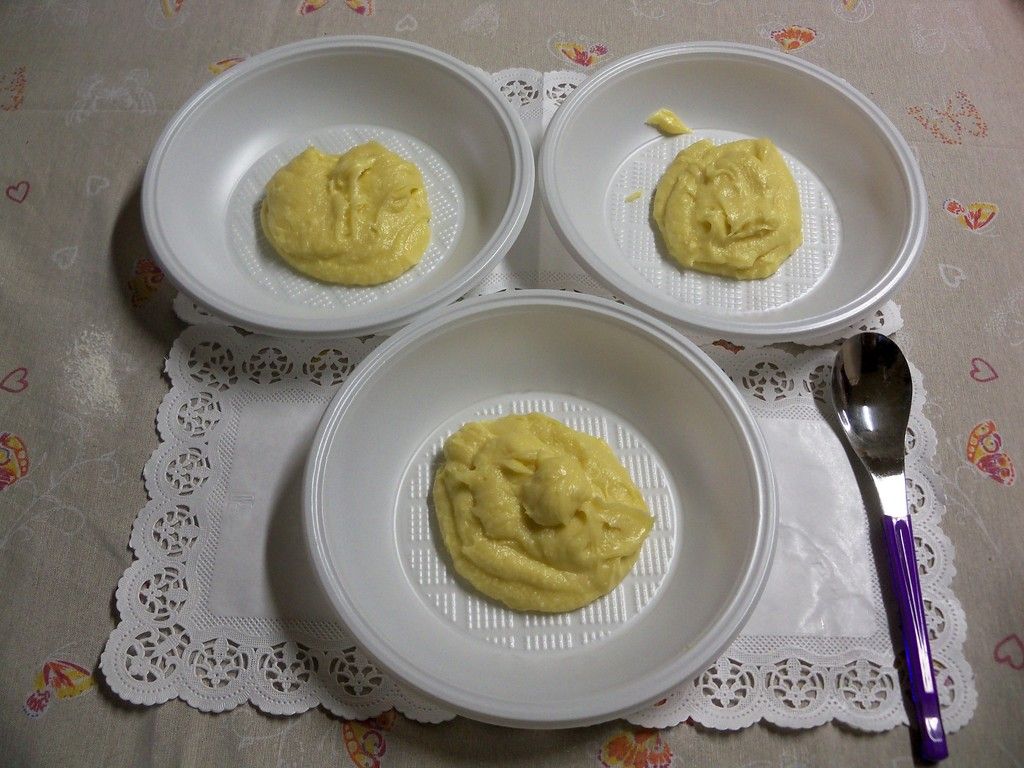
When the batter is all well mixed I split it into three, for my three different cupcake!
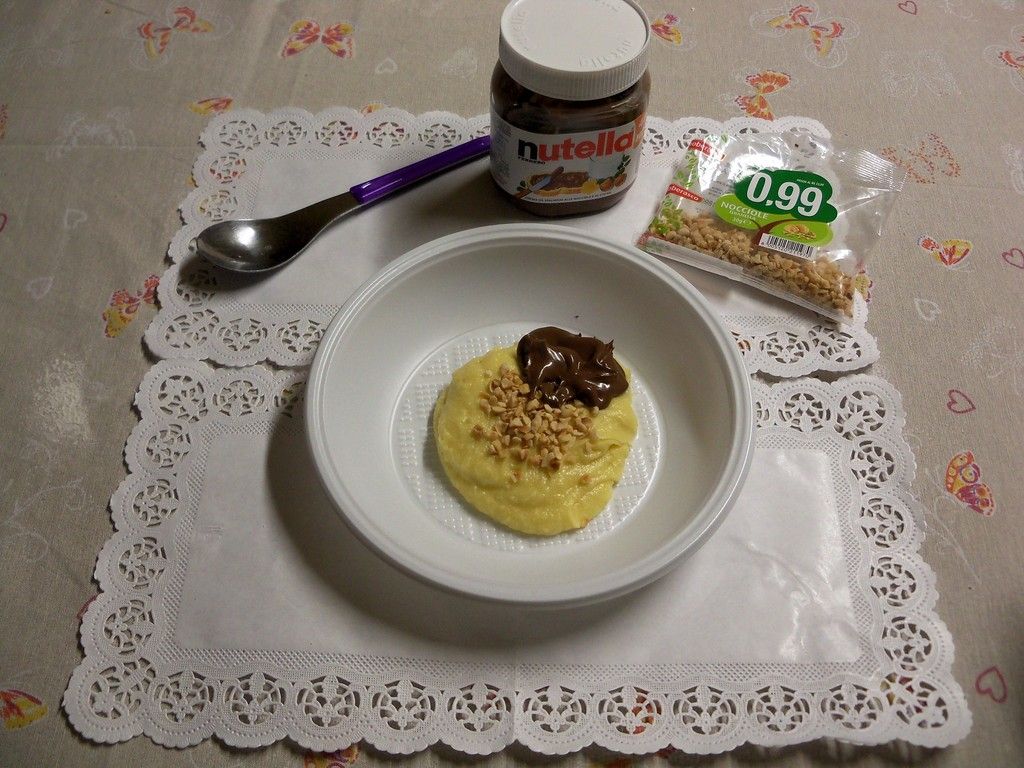
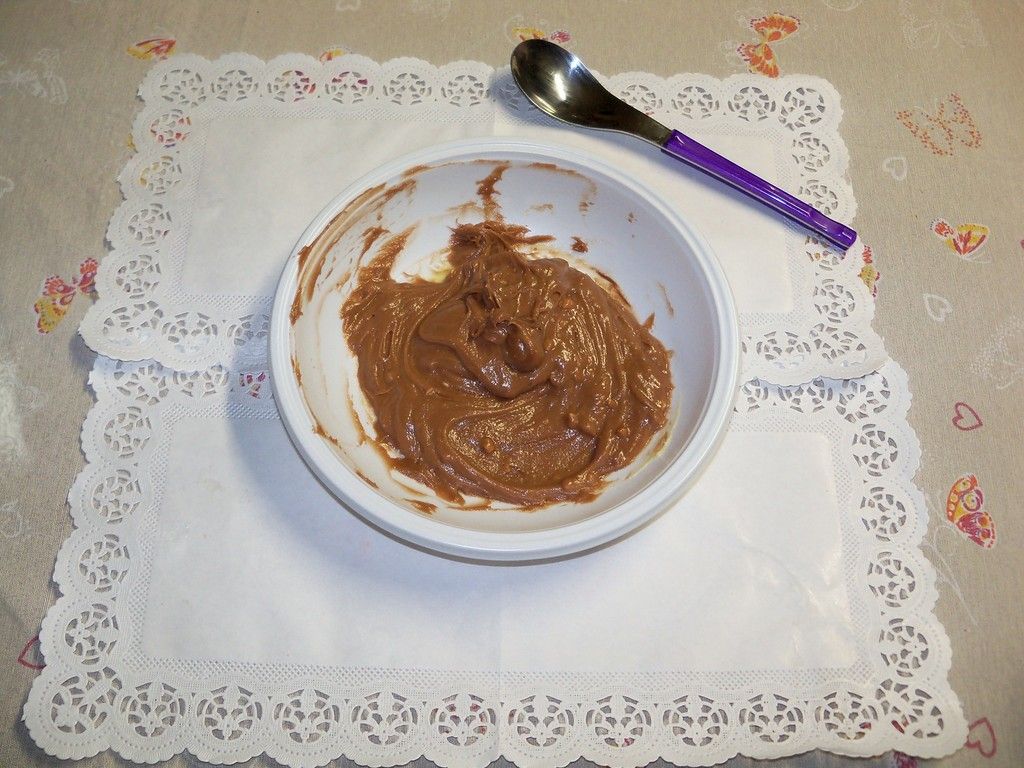
This one, is the yummiest one!
It got Nutella in it! What's better than a scoop of Nutella and a bunch of nuts into your cupcake?
NOTHING. So do that and thank me later!
It got Nutella in it! What's better than a scoop of Nutella and a bunch of nuts into your cupcake?
NOTHING. So do that and thank me later!
Onto the backing part!
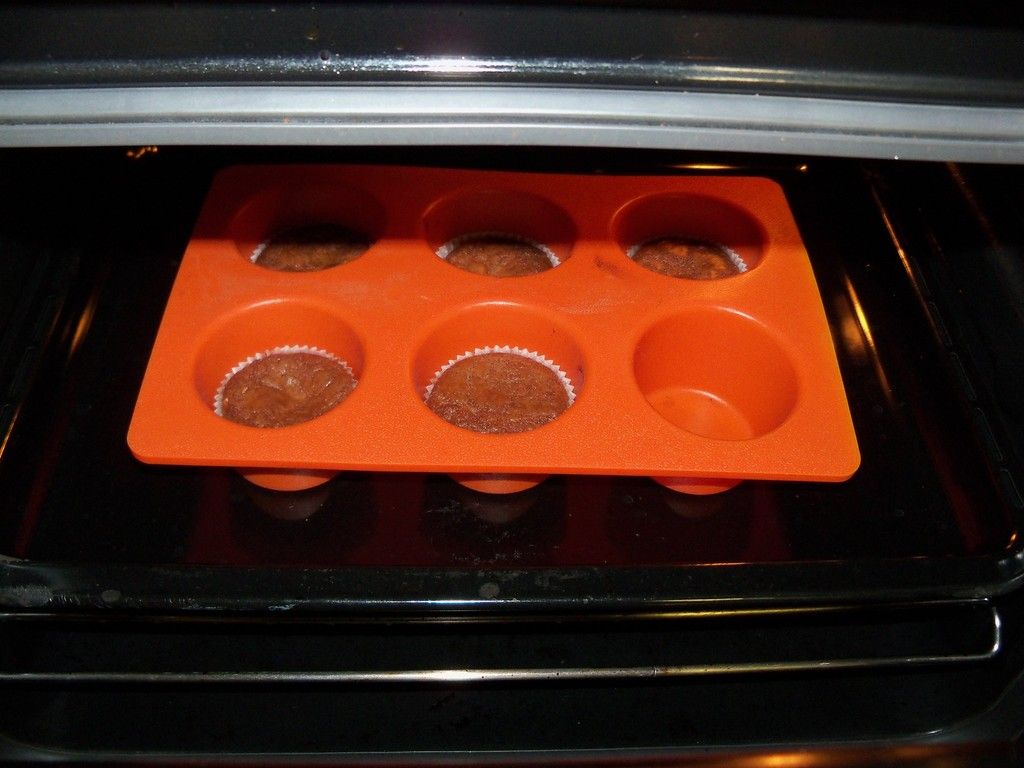
Line up a cupcake pan with paper liners firs!
Take a teaspoon and fill with the batter half of the paper liner, not to much!
Or it will overflow during the baking, we don't want that to happen right?
When you've finished all the batter, put the pan in the oven at 180 C for 20 minutes.
BUM. SMELL THAT NUTELLA.

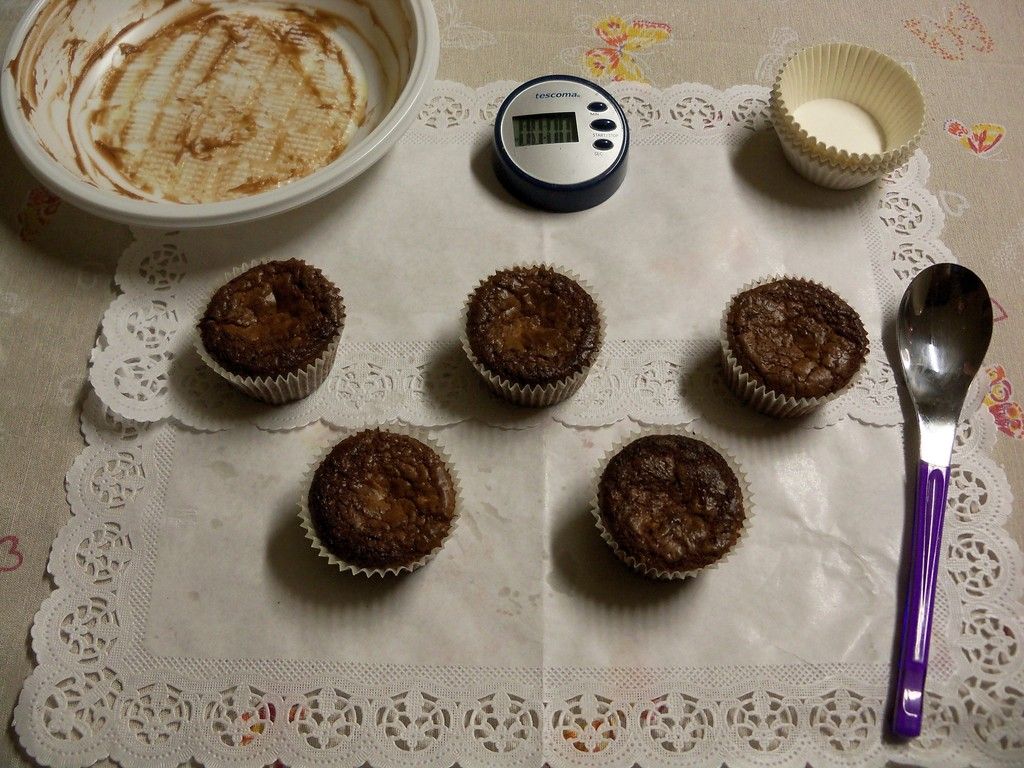
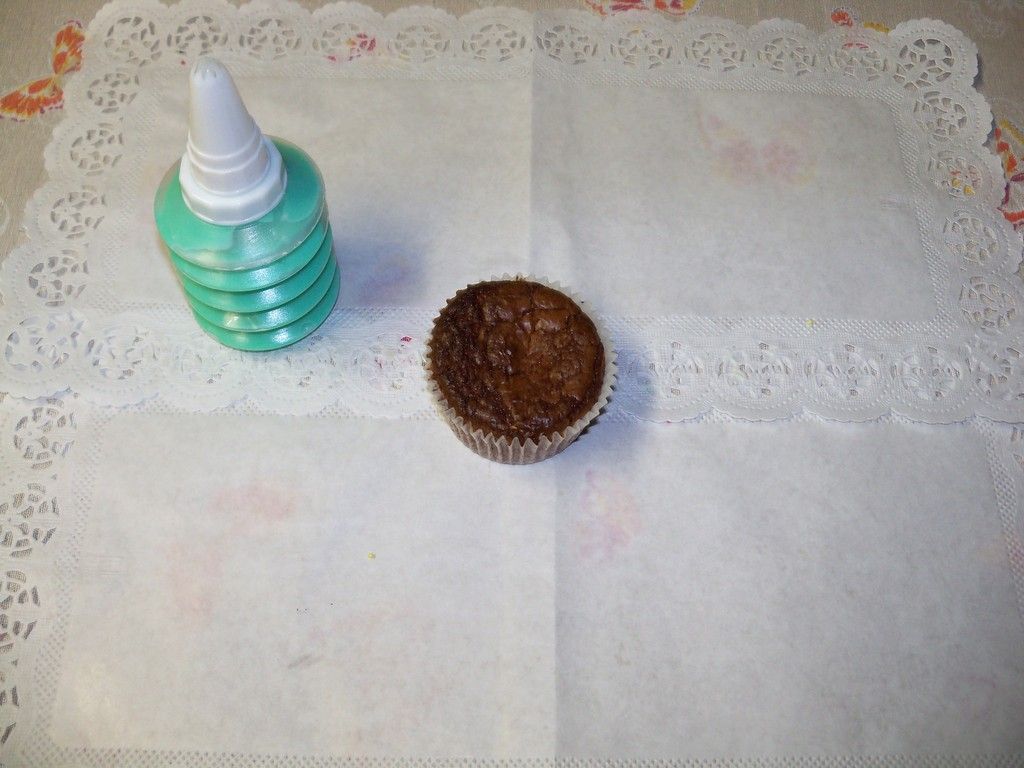
Take them out of the pan and let them cool completely.
It's important to have them really cold, or the decoration will melt away!
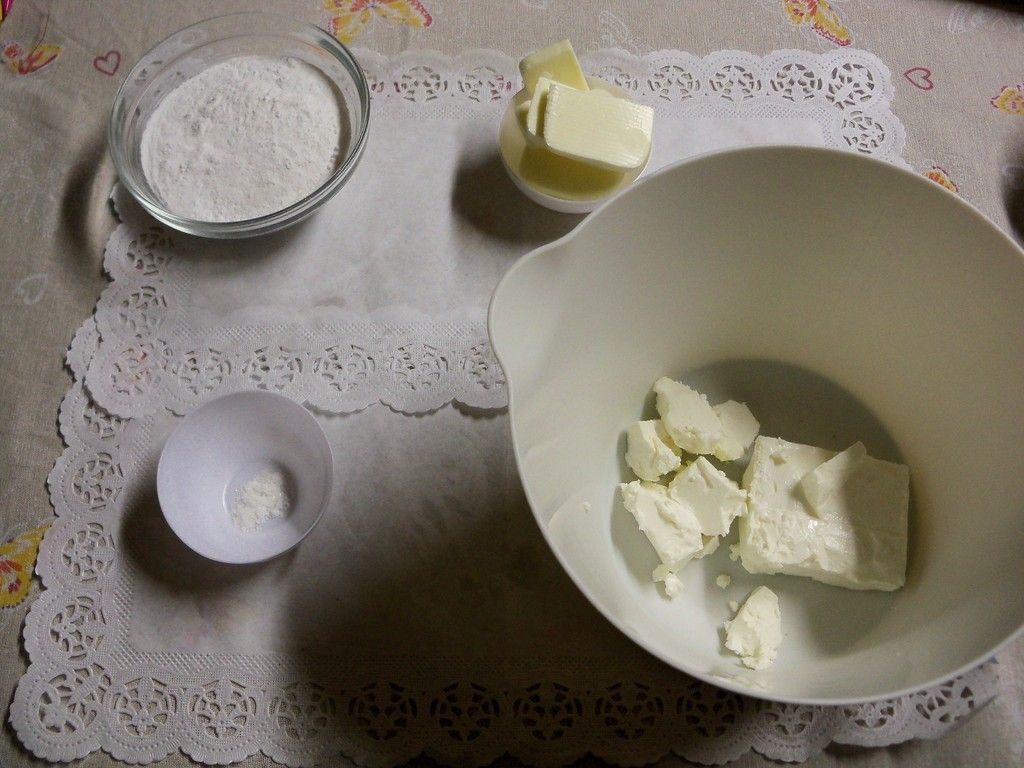
Now, the cream!
This frosting is different from the mascarpone cheese one, but it's with philadelphia!
It's more like a cheesecake to the flavor and consistency.
The ingredients are:
120 gr philadelphia cheese;
60 gr butter (refrigerated);
some vanilla powder;
95 gr icing sugar.
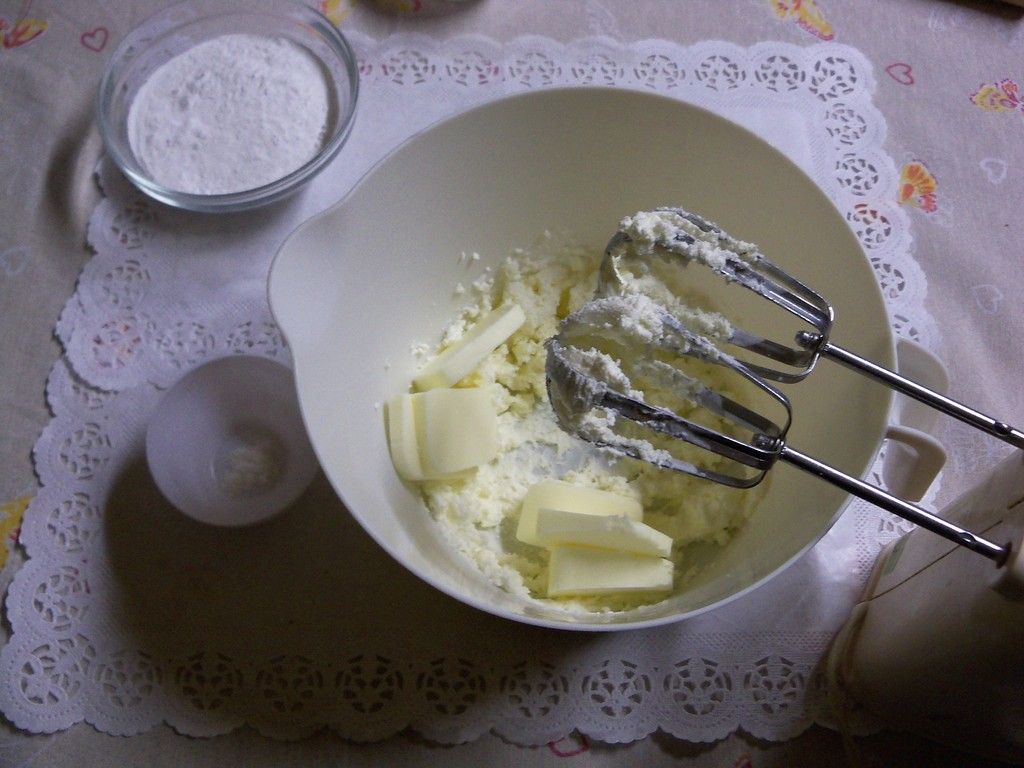
Let's mix up the butter and the philadelphia all togheter until it's smooth.

And then the icing sugar and the vanilla. Mix really well!
Divide it into two and take one of the parts.

Add some blue and yellow to color it and you're done!
Let it cool in the fridge until we will frost the cupcake!
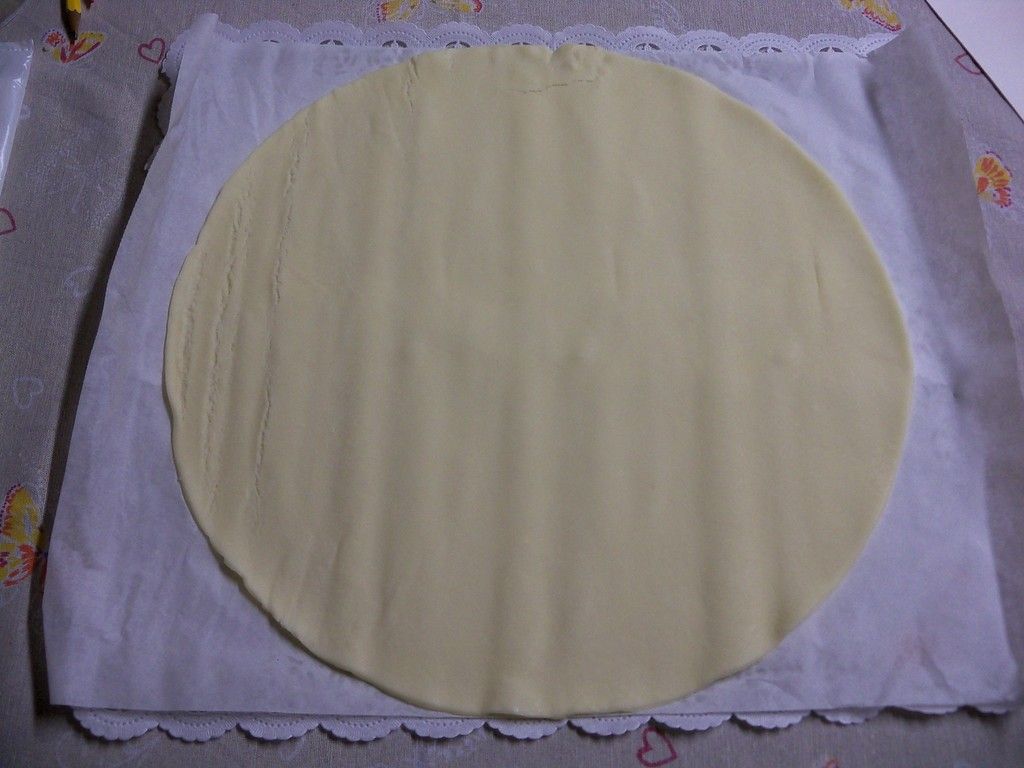
Let's do the hat cookies!
I've used pre-made crust from the supermarket, and then cut it roughly with a little knife.
Here we don't have so much of a selection of cookie cutter, so I had to do it myself.
But I bet there's a hat cookie cutter out there!
But I bet there's a hat cookie cutter out there!
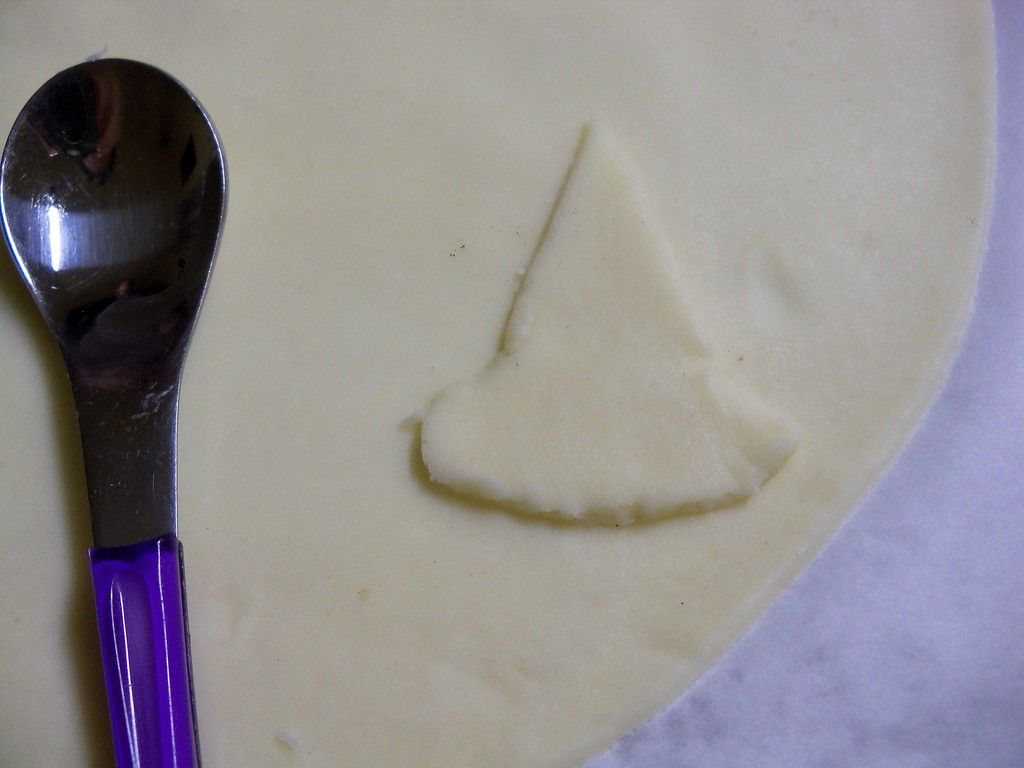
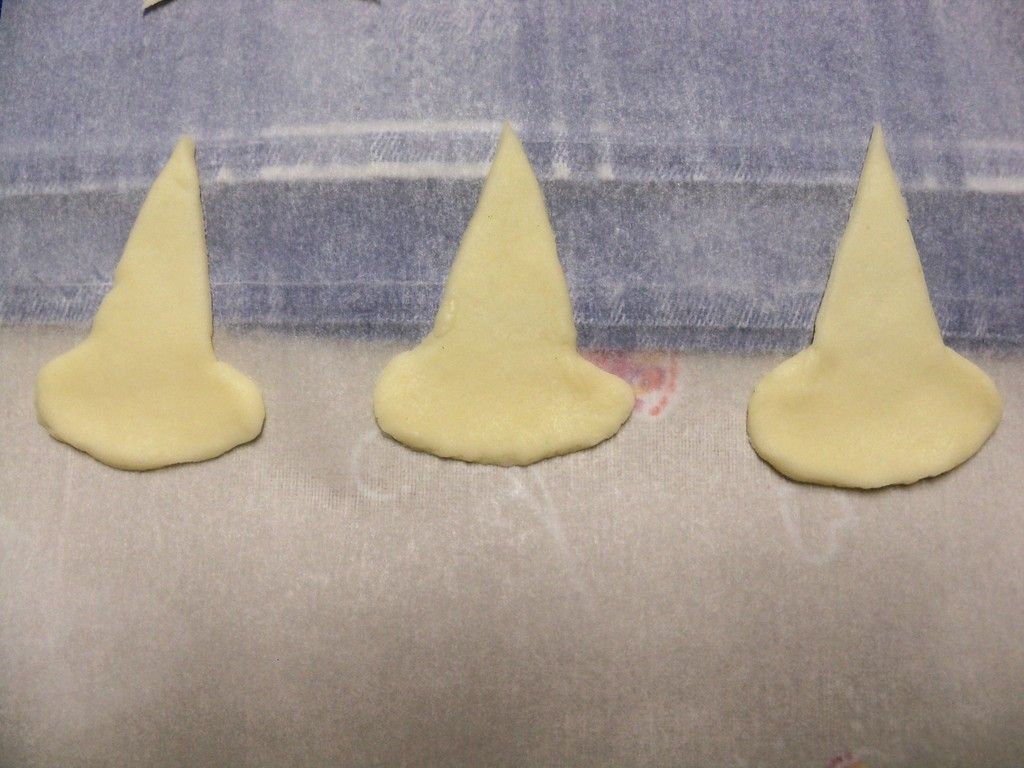
Cut off only the point of the stars, as little cute horns!
As you can see I have really little horns, with the 5 star cookie cutter you will have a better result.
You will need 3 pairs of horn, 6 pieces in total.
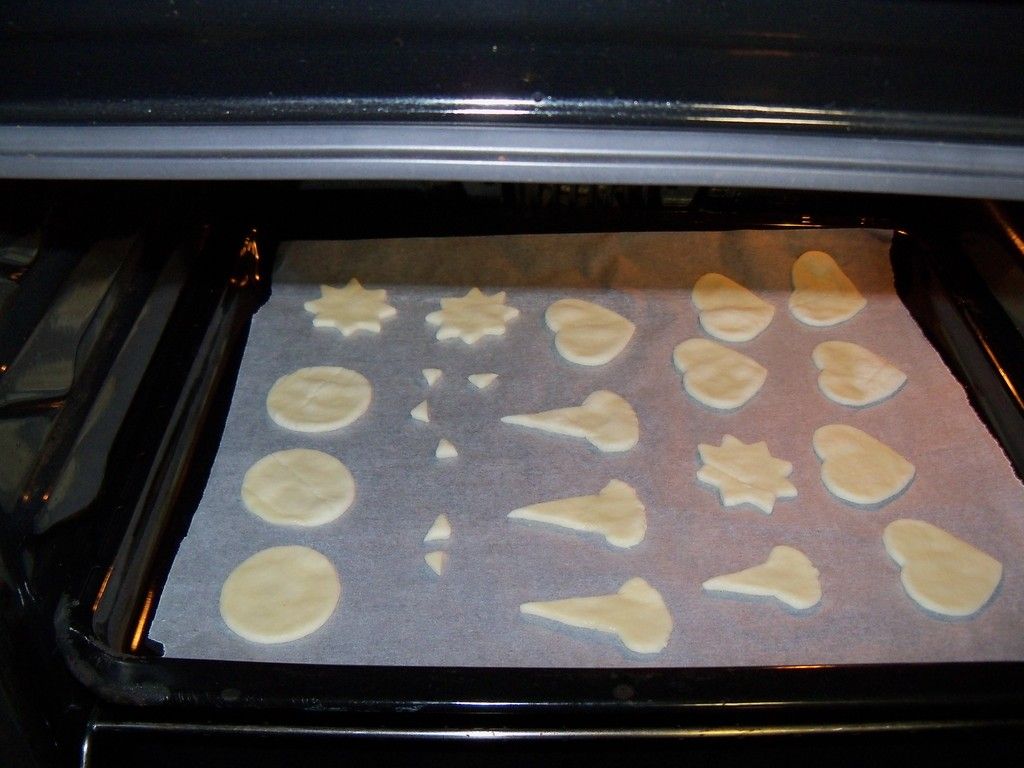
Let them bake for a bit, 5-10 minutes, when they're brown they're ready.
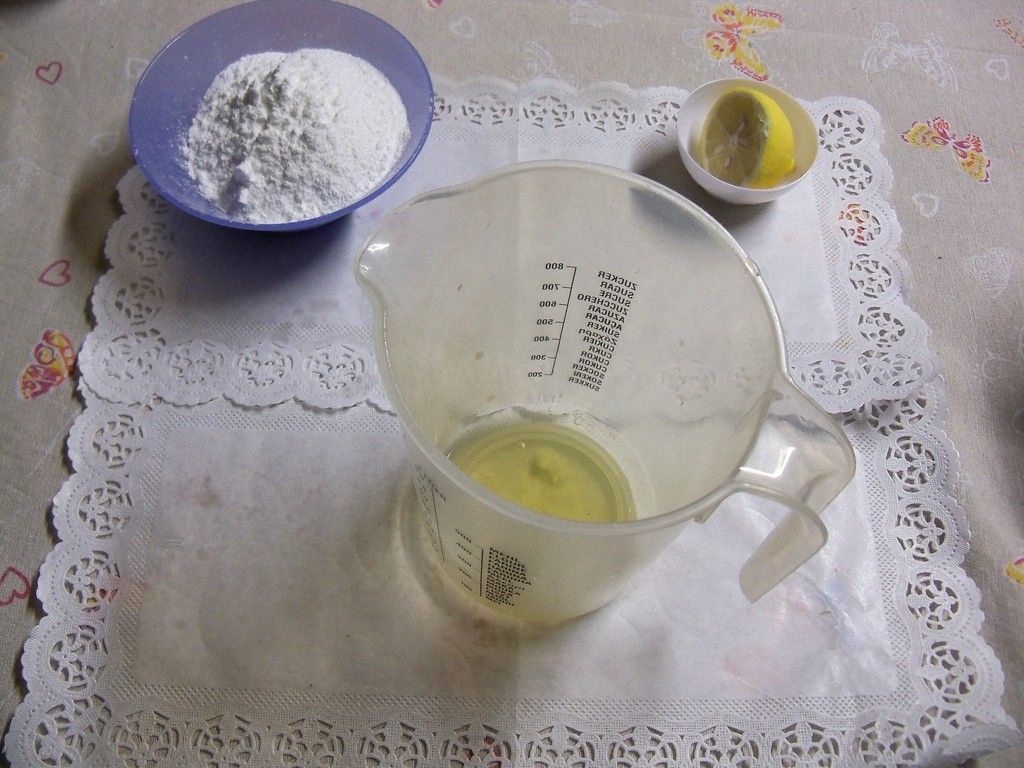
Royal icing time!
This time you will need:
150 gr of icing sugar;
1 egg white;
1 egg white;
some drops of lemon juice.


Start by adding to the egg the lemon juice.
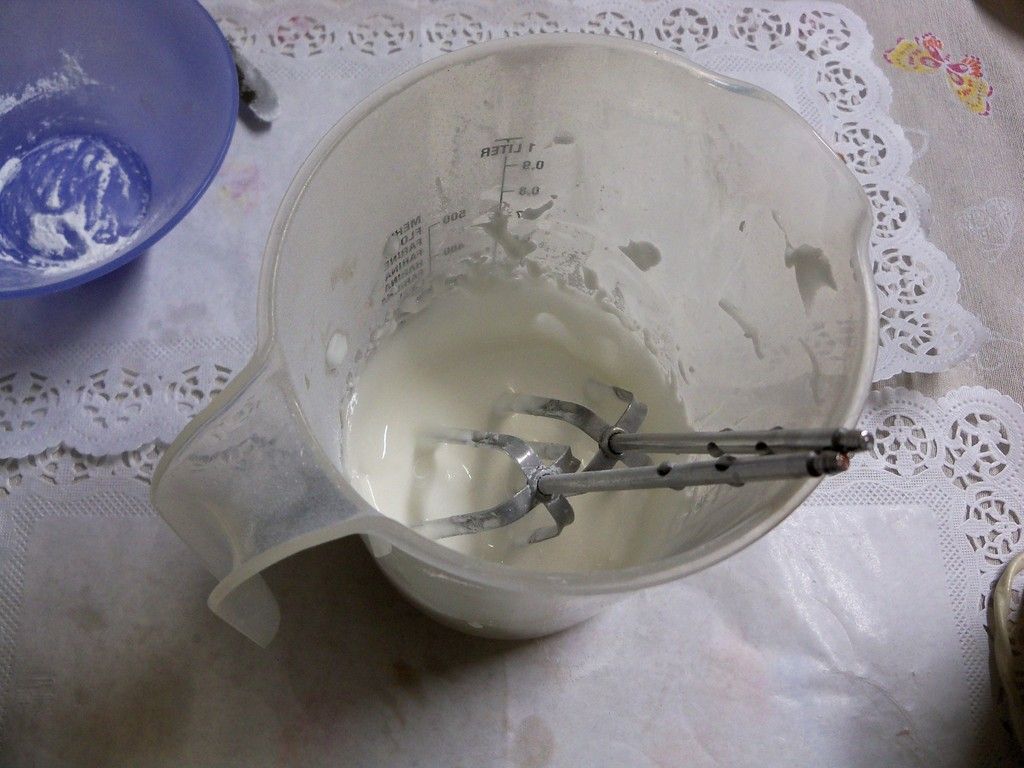
Then whip up the egg white until stiff peaks form.
Lastly add the sugar little by little, while mixing.
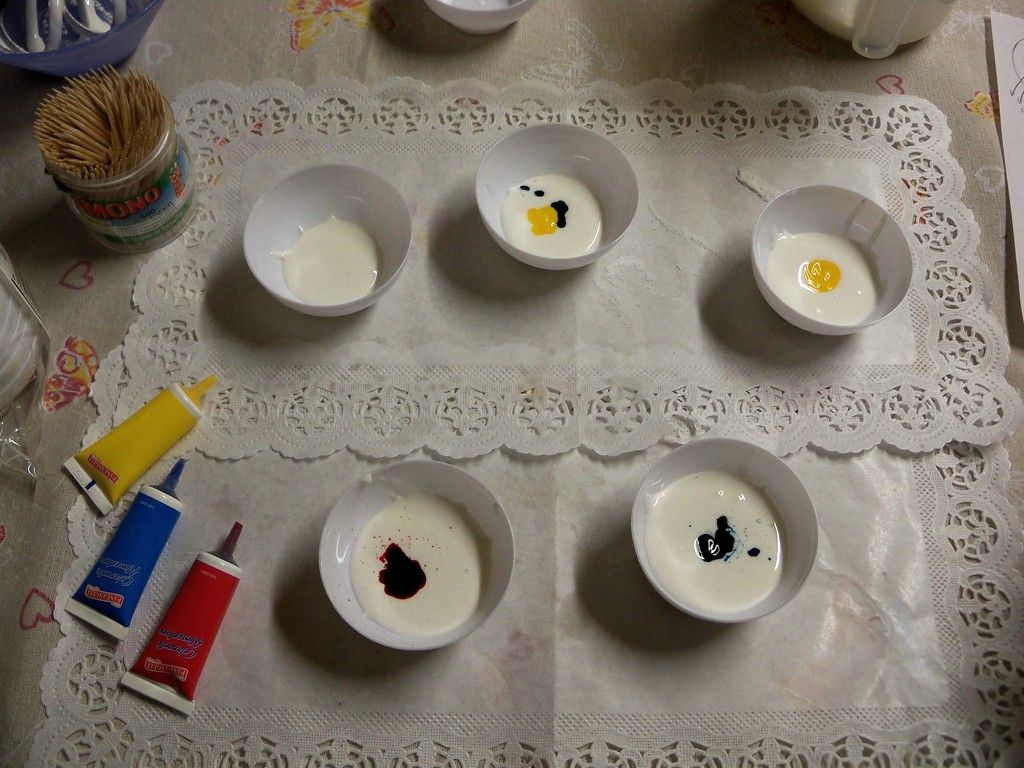

Now that the icing is complete you can divide it into small container and colour it!
For the witch hat we will need: blue, green and yellow.

This time my first idea was to make a star button, but I messed up lol , so I made a normal button.
I like it better like this, it's more old witch style!
You should try to use a M&M to make a button too! Yummy!
I like it better like this, it's more old witch style!
You should try to use a M&M to make a button too! Yummy!
Lastly, decorating everything!
First prep up all you will need:
the cupcakes;
the green philadelpia cheese frosting in a pastry bag;
some various sprinkles;
the green philadelpia cheese frosting in a pastry bag;
some various sprinkles;
the hat cookie.
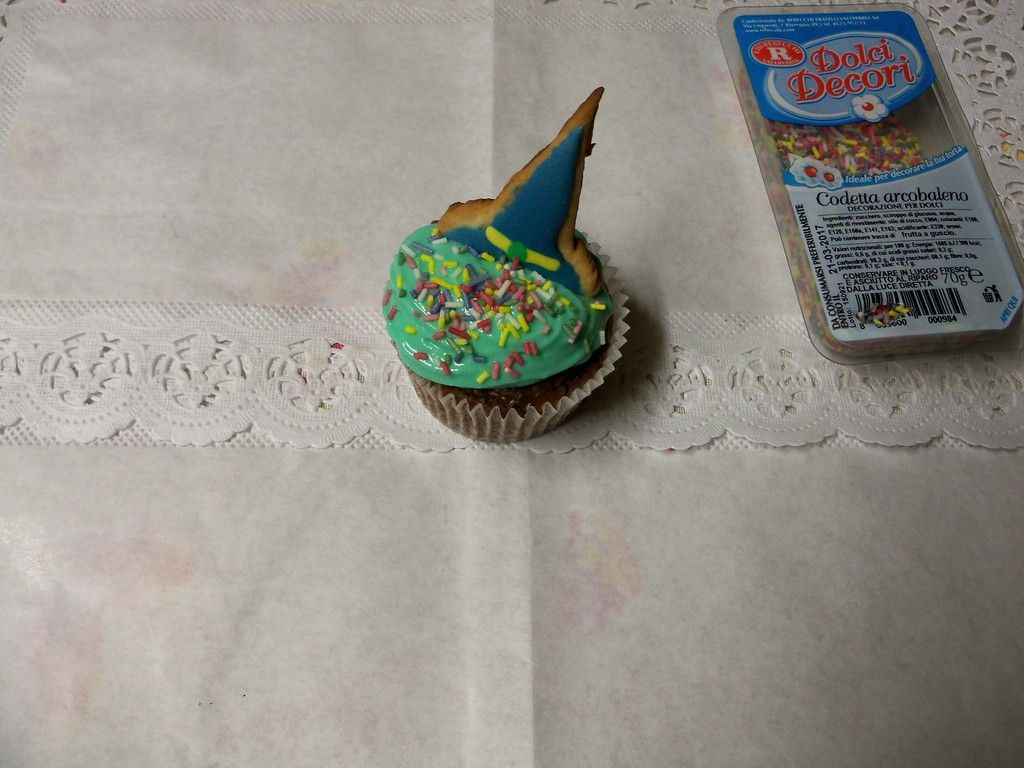

Add the green cream on top of the cupcake with "star" tip and a bunch of sprinkess.
The more the better!
Since this cooke is a bit heavier this time you need to push it into the cupcake to make it stay up!
DONE!
The more the better!
Since this cooke is a bit heavier this time you need to push it into the cupcake to make it stay up!
DONE!
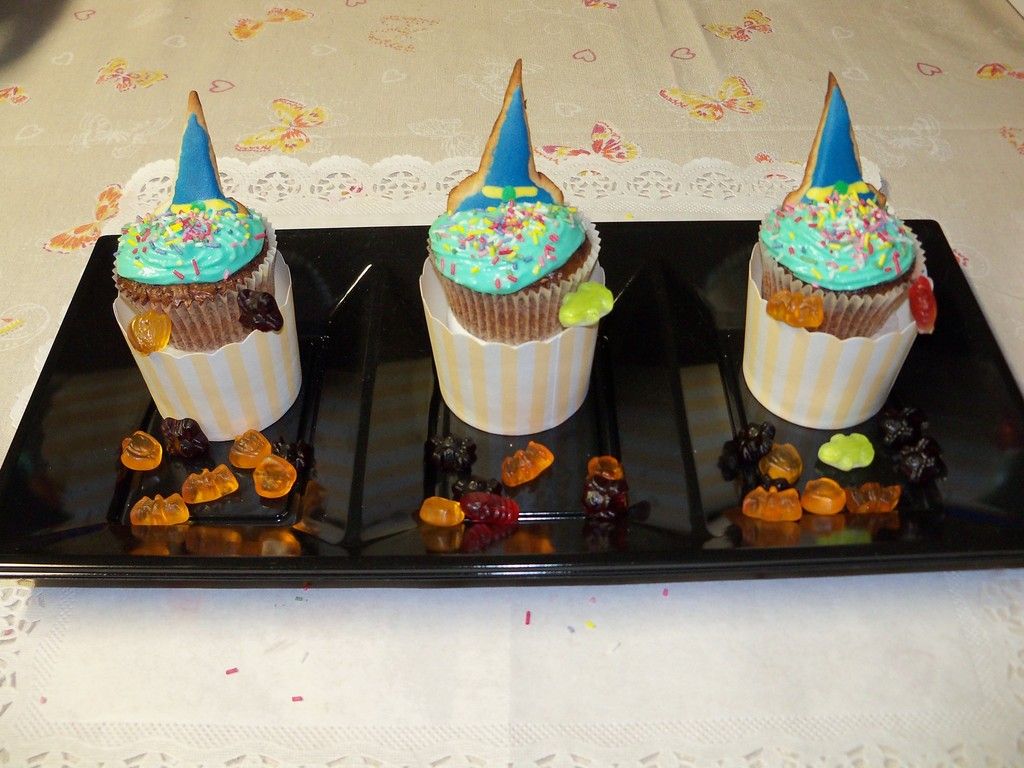
Your witch cupcakes are done!
Arent the sprinkles so magical? I tought that would be so cool!
This is the last cupcake I made for this , are they worth the effort?
Yes, totaly!
Are they Delicious?
Absolutely.
Will you try them?
I hope so! This was so fun to do, I hope you liked my ideas!
Big project like this are a bit tiring, but so good.
Have a nice halloween with friends and family with these treats!
A little note before the end:
I made this 3 different cupcake in the same day, so the ingredients are for ALL THREE cupcake together! If you want just one kind you need to SPLIT the dosage in 3, or making more cream and cookies! Or better even better...
I made this 3 different cupcake in the same day, so the ingredients are for ALL THREE cupcake together! If you want just one kind you need to SPLIT the dosage in 3, or making more cream and cookies! Or better even better...
Wait for the next week and try them all!
MAKE UP by IRETH
Halloween is near, so this week I'll show you a superduper Halloween inspired makeup! Enjoy~


|
|
||||
|
|


FINAL LOOK


Nessun commento:
Posta un commento